| Issue 108 | April 7th 2011 | Contact the Editor | How to Contribute |
|
| ||
|
Convert a Color Image to Grayscale This lesson describes how to convert a color image into grayscale using widely accepted conversion constants. Sample code and example screen captures are provided. IntroductionVision is possibly the most important human sense. It allows us to observe and assess the environment around us with a wealth of color, texture and depth information. We can act upon this information in a seemingly effortless fashion, but the processes that underlie human vision and visual perception are in fact far from fully researched or understood. Creating the Image AreaCreate a New Mainstack and drag an Image Area onto it. This is the location in which the image will be displayed. Then open the Property Inspector and set the name of the Image Area to Image. Creating the Load Image ButtonDrag a button onto the new stack. Then open the Property Inspector and change the name of the button to Load Image. Next, open the Script Editor for this button and insert the following code: on mouseUp This button allows you to open Joint Photographic Experts Group images for processing. Note: Update the type information in the code if you would like to be able to load other image types too. Creating the Convert to Grayscale ButtonDrag a button onto the new stack. Then open the Property Inspector and change the name of the button to Grayscale. Next, open the Script Editor for this button and insert the following code: on mouseUp Loading an Image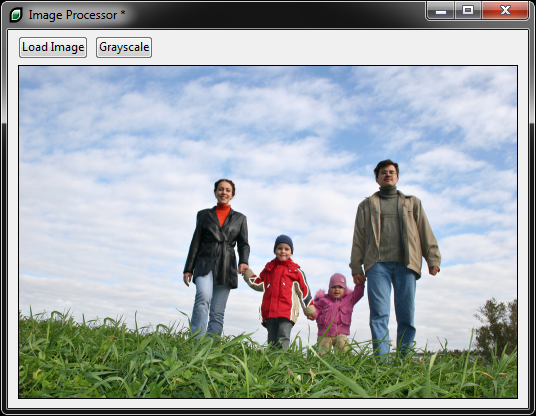
Your application may look something like the one shown in this example. After selecting the Load Image button you should get a file selection dialog that allows you to select an image from your file system. The image is then displayed in the Image Area. Processing an Image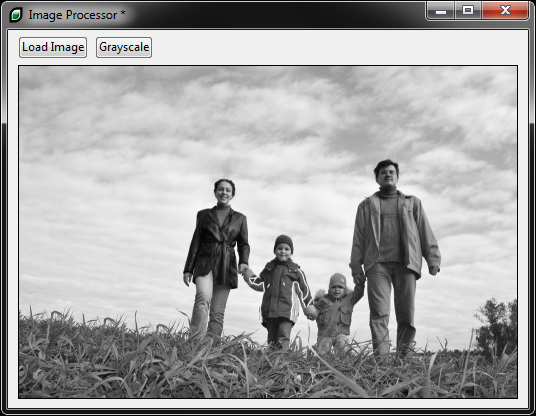
The color image is converted from color to grayscale by selecting the Grayscale button. Note: Depending on the size of the image and the processing power of your computer, this may take a few seconds. This is part one of a three part series on Vision. At the end of the series, we will publish a sample stack for you to take apart.
| 

 Tweet
Tweet
|