
| Issue 129 | February 23rd 2012 | Contact the Editor | How to Contribute |
|
| ||
|
Installing custom fonts on iOS Choosing the correct font for your purpose can uplift your interface and improve the user experience. Livecode provides a useful set of functionality allowing us to handle fonts, which has recently been extended to cover the installation of custom fonts on iOS. The following lesson will detail how to use this functionality to install and use a custom font using a very simple 'font picker' app. Setting up the app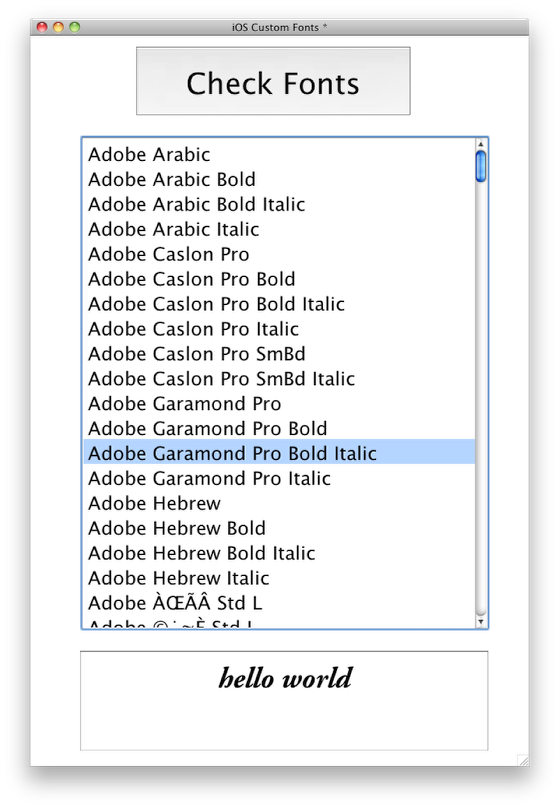
The app we're going to design will look like the one above, and will consist of: a button to check what fonts are available, a list field to show these fonts, and a field we can enter text into which the font will be applied to. Once you have created and arranged these objects on the card, we need to apply a few lines of code to the button and our list field. Our button is going to check what fonts are available on the machine our app is running on, and place them in our list field in alphabetical order. We can use the fontNames function to do this - this function returns a list of the fonts installed on the system. Our code should look something like this: on mouseUp Placed in the script of the 'check fonts' button, this will produce the desired result; an alphabetical list of the available fonts in our list field. Now we need to put code in our list field's script so that it can set the font of the text field to whatever font we select in the list field. Since each line in the list field is taken from the fontNames function and as such is a valid font name, we can simply do the following - but make sure that the list field's 'listBehaviour' property is set to true first so that it can act as a list. on mouseDown Lastly, we need to put a piece of code on our stack script, in the preOpenStack handler. This will make sure that our app is displayed correctly when using newer iOS devices running outside the development environment (i.e. on the mobile device). on openStack The iphoneUseDeviceResolution command instructs iOS devices with newer high resolution displays to use the native screen resolution. Installing the custom font on our iOS device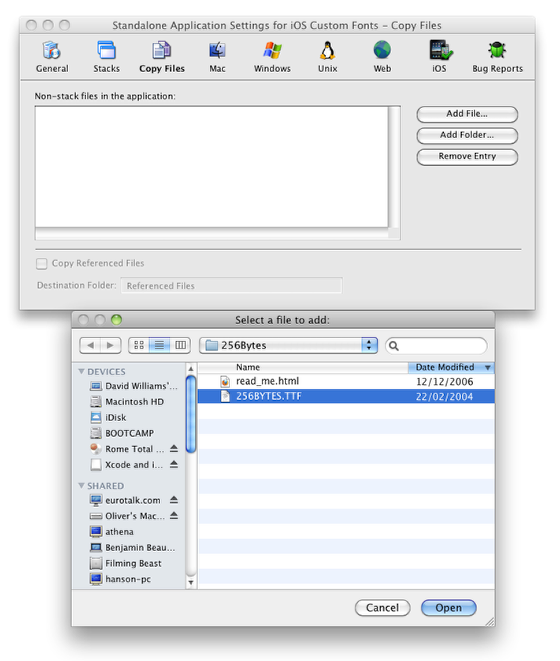
If you run your app on an iOS device, you should now be able to see the list of default fonts available on iOS, which is likely notably shorter than if you run the app on a desktop computer. We will now install our custom font. To do so, all we need do is include it with the application bundle when we build our app as a standalone application. To do this, we must go into the standalone application settings for our app, and under the 'copy files' section, click 'add file...' and choose the font file as displayed above (the font I am using in this instance is named '256Bytes.ttf'). When deploying to the iOS device, Livecode will recognise the .ttf file extension for our font file, and install it as a custom font. Using our newly installed custom font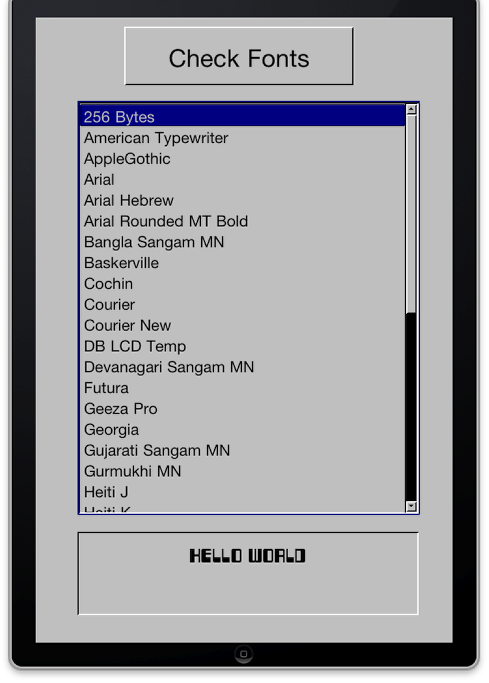
After including this file in the list of files to be copied into the application bundle, if we build and run our app again on our iOS device, we should see our custom font displayed in the list when we click 'check fonts'. Clicking on it in the list, we can see our sample text change to the desired font. You can download the stack I created to use for this lesson here.
| 

|