|
It is often the case that stacks need to be resizable particularly when they may contain a variable volume of content. This can be problematic if you have spent a great deal of time making a visually impressive stack and have a large number of controls to reposition and resize. The geometry manager is a good way to solve this problem and can save you a great deal of time writing resize handlers. Having only been working at Runtime for a short time I'm still very much in the learning process. When designing stacks I initially found the geometry manager to be a little confusing, and now that I understand how it operates I thought that this newsletter would be a perfect opportunity to go through its basic features.
Its basic function is to allow you to adjust the way that controls are scaled or reposition themselves when the stack is resized. To access the geometry manager select the control you wish to manage using the pointer tool and open the property inspector. From here you can select "Geometry" from the drop down menu at the top of the dialog.
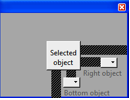
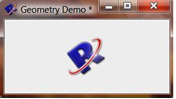
Objects can have either their position or scale adjusted upon a stack resize. Lets look firstly at the repositioning functionality by selecting the "Position selected object" option. For all the following examples vertical and horizontal geometry is dealt with separately. The "linking area" can be seen below (Fig 1-3).
As shown above, each object can have its position adjusted relative to either another object within the same card or the edge of the stack. Firstly let us look at the horizontal adjustment; this is controlled by the two black bars to the right of the "Selected Object" button in the centre of the linking area. The uppermost bar controls positioning relative to the stack edge and the lower of the two bars controls positioning relative to another object. The behaviour of these bars is as follows;
When in the black state (Fig 1) the geometry manager will do nothing to either position or resize the selected option.
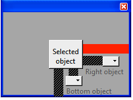
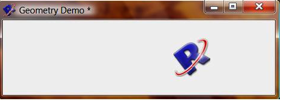
Clicking on the bar once will result in the bar turning red as shown in Fig 2. This creates an absolute link and means that the object will stay a fixed number of pixels from whatever it is being resized relative to i.e. when the size of the stack is increased the object will move and stay the same distance it was before the resize away from the stacks edge.
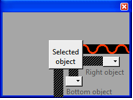
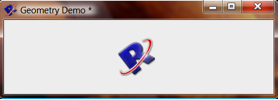
Clicking on the bar a second time will cause the appearance of a red wave graphic as shown in Fig 3. This creates a relative link and means the object will remain a percentage of the cards total width away from the object it is being set relative to. So for example if a control is centred in a stack it will remain centred upon resizing as shown below.
If instead of positioning the selected object relative to the stack edges you wish to position it relative to another object on the card this can be achieved by using the drop down box attached to the shorter of the two link bar controls as shown below.
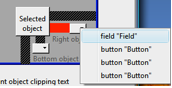
The drop down menu will contain a list of all the controls present on the current card. The absolute or relative link you then set will be maintained relative to the selected objects position rather than the stack edge.
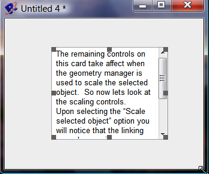
The remaining controls on this card take effect when the geometry manager is used to scale the selected object. So now lets look at the scaling controls. Upon selecting the "Scale selected object" option you will notice that the linking area changes its appearance, there are now additional linking bars that connect to the top and left of the linking window.
When setting the resize properties the link controls operate in much the same way as they did for the positioning properties. Again a single click will result in an absolute link (solid red line) and a second click will result in a relative link (red wave). The absolute link will keep the desired edge of the object a fixed number of pixels away from the linked object or stack edge by stretching or reducing the object in size. The relative link will keep the desired edge a percentage of the total width/height of the stack away from the linked object or stack edge.
When dealing with the resize settings of a field containing text or an object with a text label you may wish to ensure that the text is still viewable even when the stack has been resized to an insufficient size to display all its contents. To do this you can select the "Prevent object clipping text" option. This will preserve a minimum size at which all the text contents can be displayed without clipping and no further reduction in size will occur.
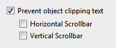
By additionally selecting the horizontal or vertical scrollbar options instead of having a minimum size the stack will continue to reduce in size until vertical and horizontal scrollbars are generated that allow all the text to be viewed as shown below.
If you would prefer to manually set a minimum or maximum size for the control this can be achieved using the "Limit object" option.
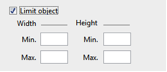
This simply allows you to specify a minimum/maximum height or width at which the control will cease to be resized.
The final control on this card "Remove All" will remove all geometry settings that have been applied to the currently selected object.
General Tips
- If there is a resizeStack handler in your stack, you will need to pass the resizeStack message at the end of the handler in order to make the geometry manager work.
- If you intend to make your stack resizable, either with a resize handler or using the geometry manager, it’s a good idea to keep on top of things as you go along, this prevents the number of controls you need to deal with from getting out of hand.
- To force the geometry to manually update at any time you can use the revUpdateGeometry command.
- You can use the Geometry Manager to scale objects with a divider bar. Link the edges of the controls to the divider bar, add a script in the divider to move in response to a mouse action, then call revUpdateGeometry each time it moves to have the objects scale automatically.
- Setting a minimum height and width for your stack in the size & position section of the property inspector can prevent overlapping of controls when the stack becomes too small.
For further information on using this feature see section 4.4 of the user guide.
|