|
Just before the Christmas break, I had been messing about with a race car driving around a track in Revolution. I noticed that the car didn't always seem to travel where I expected it to, so I reached for my magnifying glass, deerstalker hat and pipe...
When you repeatedly move sprites over small distances, the path they travel on over time can get distorted. Have a look at this demo stack. The left and right sprites are supposedly both moving 5 pixels at a time at a 3 degree angle. The left hand sprite is travelling along the correct path and the right hand sprite is being thrown off course due to it's co-ordinates being truncated.
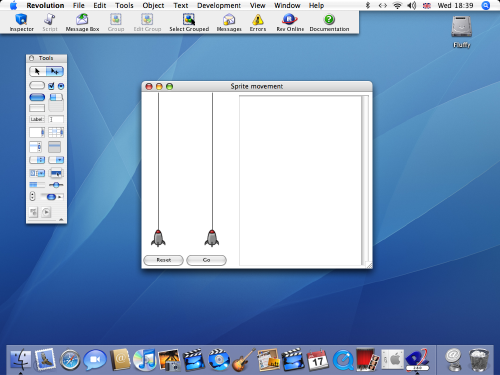
The 'molNewLoc' handler calculates a new location (x,y) which is a specific distance and angle from the target sprite's current location. The right hand sprite's new location is being calculated using this handler, but each time a new location is returned to us, the x and y co-ordinates are stored as integers against the sprite ('location' property), so we lose the decimal parts of x and y each time round the loop. The values and truncated values for the right hand sprite are shown in the text field.
The 'molMove' handler simply calls the 'molNewLoc' handler, but stores the location returned in custom properties of the sprite (molX and molY). The 'molNewLoc' handler recognises when these properties are set and uses them instead of the current sprite location – allowing us to follow the intended path correctly. The Left hand sprite is using this method.
One point to note is that if you manually move a sprite that has the 'molX' and 'molY' custom properties set then call the 'molNewLoc' handler, the sprite will be repositioned back to the last known location defined by the custom properties. The 'molReset' handler empties the custom properties, allowing you to reposition the sprite and 'start again' at another location.
Have a look at the 'molNewLoc' and 'molMove' handlers - there isn't a lot to them, but they can be useful.
Moving a car
Have a look at this next demo stack. We are going to move a car around the screen. To control the car's speed, we could;
- Call a handler every so often – more frequently to go faster and less frequently to slow down.
- Move by a greater number of pixels to go faster and by less pixels to go slower.
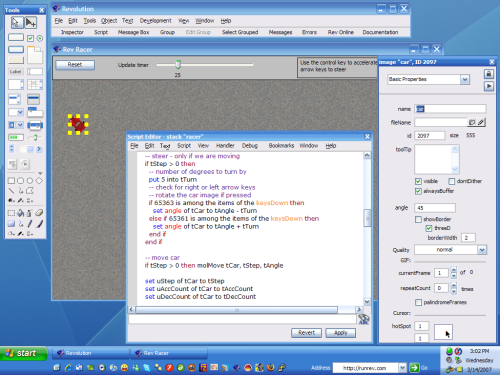
For this demo, I've opted to keep the timing of the handler constant and vary the number of pixels we move by to control the speed. The handler to update the car's position is 'updateCar'. The sprite in this demo uses the following custom properties;
- uStep – The number of pixels to move by (speed)
- uAccCount – We will only increase the car speed if the accelerator key has been pressed for a certain number of consecutive calls to 'updateCar' – this lets the car accelerate more gradually.
- uDecCount – Speed will decrease if we aren't accelerating. This counter allows the decrease in speed to be more gradual.
- uMaxStep – The maximum speed, i.e. The greatest number of pixels we will move the car by.
This simple demo shows how easy it is to move a sprite around using Revolution. We can control the sprite's speed and direction with a few keys. Next time, we will combine this example with the collision detection from part 1 and add a racetrack.
|