Perhaps the most powerful aspect of Revolution is the ability to write a small tool or application in a matter of minutes. Even large scale projects can be completed in a fraction of the time it would take to write them in one of the traditional languages. But how can you make your tool or application different to all the others out there on the web? Welcome to the world of 'skinning'! Revolution makes it easy to transform your application into a rich, visually appealing tool in a few very simple steps.
If you would like to experiment, you can download the stack to accompany this tutorial, hhttp://www.runrev.com/section/revselect/valentina/index.phpe.
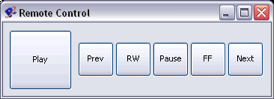
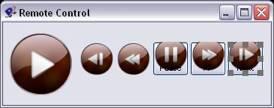
So lets start off with the stack that we want to skin. A common application that is really lifted when skinned is a remote control.
Buttons
First lets skin the buttons. Revolution allows you to associate a number of images to a button. This is done using the properties palette of the button in the 'Icons & Borders' section. We will use two of these associations in this tutorial:
Icon - The image displayed in the button's default state
Armed Icon - The image displayed when the mouse is moved over the button
Next we need to choose two images, a standard state and a rollover state for each button. To associate them to a button, we have to import them as controls to the stack. A standard way to do this is to create another card, in this case a second card called images, onto which we import the images.
The images in this tutorial were produced in Photoshop, but there are many places where great icon sets can be purchased and even applications that let you build your own icons. Note: You must use images that have transparent edges for this tutorial to work, .png and .gif files are ideal.
Go to File > Import as control > Image File
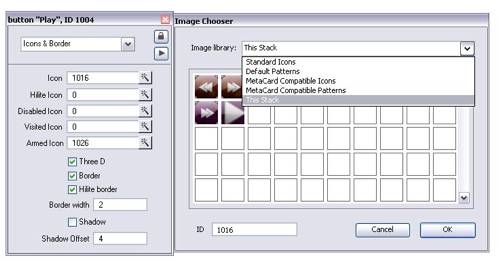
We can now return to the 'player' card and associate all of the images to the buttons. Open the properties palette of the first button and select 'Icon & borders'.
- Click on the wand to the right of the Icon field which will open the image chooser.
- From the pull down menu, select 'This Stack' which will display all images located anywhere within this stack, including our 'images' card.
- Then choose the image you want as the standard state for the button.
Repeat these steps for the over state by clicking on the wand to the right of the 'Armed Icon' field and then repeat the whole process for each button on the remote control.
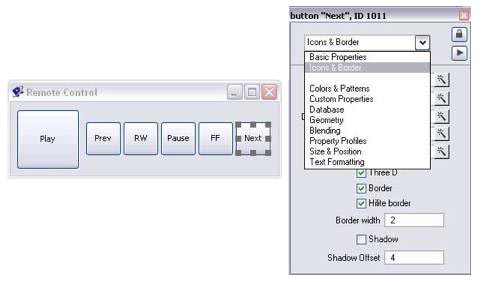
To make the buttons blend into the background we have to alter one or two of the buttons basic properties. In the buttons properties palette, select 'Basic Properties' from the pull down menu and change the style of the button to 'Transparent Button' and uncheck the 'Show name' property.
Now we want to make the buttons change to their 'armed icon' image whenever we hover the mouse pointer over the button. Select one of the buttons and then type the following command into the message box:
set the autoarm of the selobj to true
This sets the 'autoarm' property of the selected object (in our case our button) to true. Now when you hover the mouse pointer over that button it will change to the 'Armed Icon' image.
Note: The autoarm property does not work when you place the buttons in a group. If you wish to do so you will need to manually implement this feature by setting the icons in mouseEnter and mouseLeave handlers.

Skinning Stacks
Like buttons, it is possible to associate an image with a stack. We do this in a similar way to the skinning of buttons but the stack will take on the shape and transparency properties of the image.
- Import the image as a control, this time to the main card.
- Bring up the images property inspector and select 'size and position' from the menu.
- Set the layer of the image to 1
Now open the stack inspector. Select 'basic properties'. You will notice a property called Shape which has a wand button just like the 'icon and borders' of the buttons. Use it to select the image you have just imported.
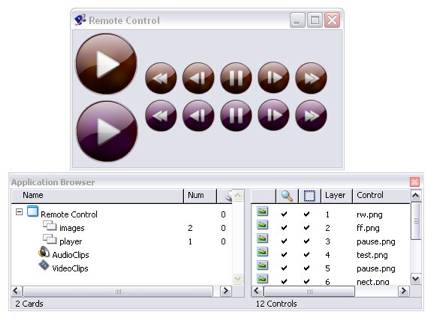
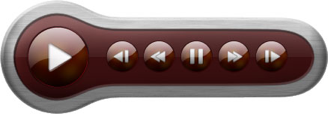
Your stack should now be the same shape as the image. You may need to line up both the background image and your buttons to the new window shape but you should end up with something that looks like this:
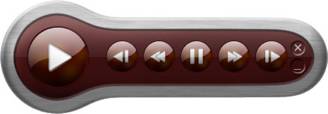
You will notice that you no longer have access to the minimize and close stack buttons available in a normal window panel. Create two buttons, one to close the stack, the other to minimize it. Put 'quit' into the mouseUp handler of the close button and put 'set the iconic of this stack to true' into the mouseUp handler of the minimize button.
Finally, you will also notice that without the title bar, it is not possible to drag the stack around the screen, this has to be implemented manually. The following code placed in the script of the background image will allow you to grab and move the controller around the screen.
on mouseDownput item 1 of the mouseLoc into sgLeftOffset
put item 2 of the mouseLoc into sgTopOffset
put true into sgDragging
end mouseDown
on mouseMove
lock screen
if sgDragging is true then
set the left of this stack to item 1 of globalloc(the mouseLoc) - sgLeftOffset
set the top of this stack to item 2 of globalloc(the mouseLoc) - sgTopOffset
end if
unlock screen
end mouseMove
on mouseRelease
put false into sgDragging
end mouseRelease
on mouseUp
put false into sgDragging
end mouseUp
|