
| Issue 139 | September 7th 2012 | Contact the Editor | How to Contribute |
|
| ||
|
Scroll a card that is taller or wider than the window
As an example we are going to create a stack for viewing a map of Edinburgh. The map is larger than our viewing stack so we need to be able to scroll the map to view different parts. First we create our stack, resize it(1) and turn off the ability to resize the stack(2) 
Import the map Now we import our map using Import as Control from the File menu. This imports the image on to our stack ready to be used. How big is our map?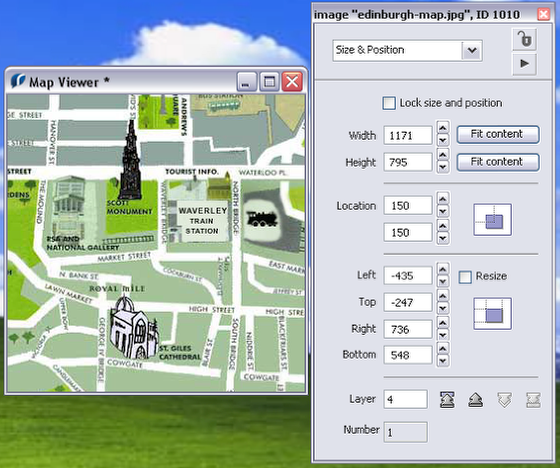 Now that we have imported the map we can see that it is much bigger than our stack. If we check the property inspector we can see that it is actually 1171 x 795, compared to our stack which is only 300 x 300. Make the map scrollable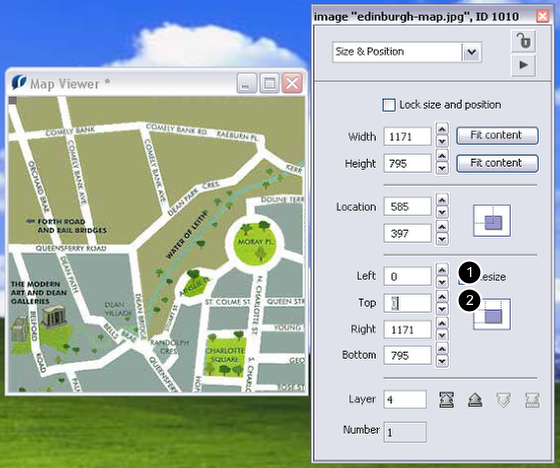
If we want to be able to see different parts of our map we need to be able to scroll it. As we can't make an image scroll we will put our map into a group. It may seem a little unnecessary to group a single object but in this case we do it because when you scroll a group the contents scroll so we can use this to show us different parts of our map. Firstly we want to position the map so that it's top left corner is in the top left corner of the stack, our scrolling will then be relative from that point. We can do this in the property inspector of the map image, we just set the left (1) and top (2) co-ordinates of the image to 0. Group the map
We select our map image and then use the Group button in the toolbar(1) to create a group containing our map, we will call this group map display (2) Resize and position the group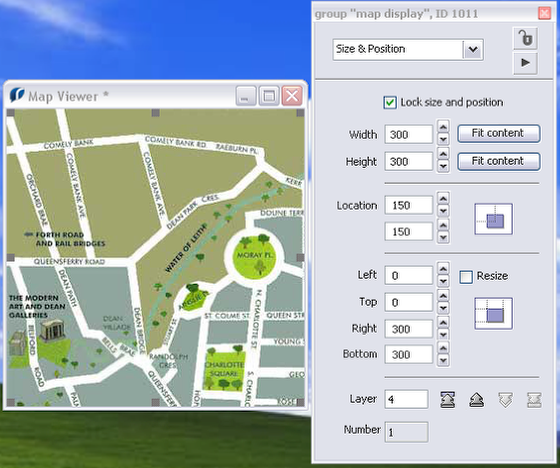
We now need to make our map scroll, firstly we make the map display group the same size as our stack and lock it's size and position. This means when the group is scrolled the displayed contents scroll but the group itself stays in the same position on the card. This allows us to see different parts of the map. After setting these options you might need to set the topLeft of the map display group back to 0,0. Make the map scrollable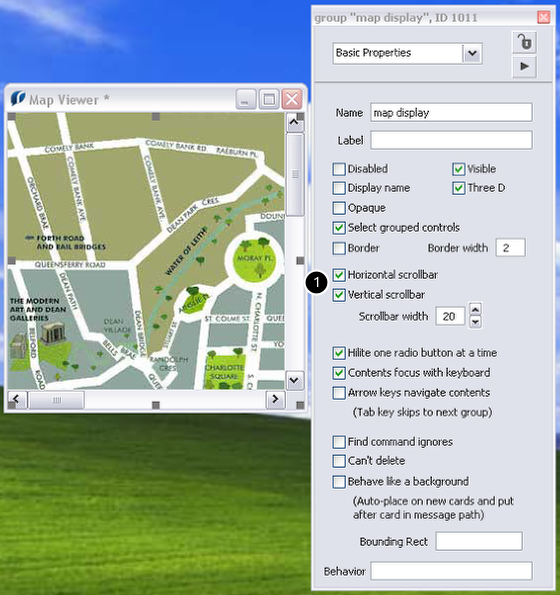
Now to make the map scroll all we need to do is to add horizontal and vertical scrollbars to the map display group(1) Scroll the map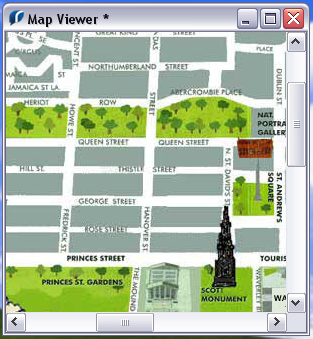
You can now use the scrollbars to show you Thistle Street, the home of RunRev. Improving the look of the stack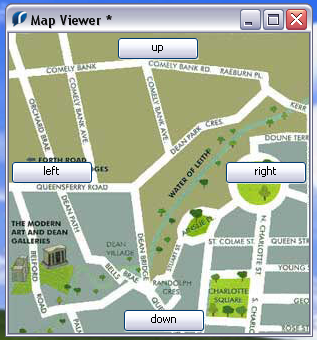
Having 2 scrollbars on your stack certainly works but maybe the stack would look nicer without them? I think so. Instead of the scrollbars lets add some arrow buttons to allow us to navigate around our map. Firstly lets remove the scrollbars and add our buttons up, down, left and right. Import button graphics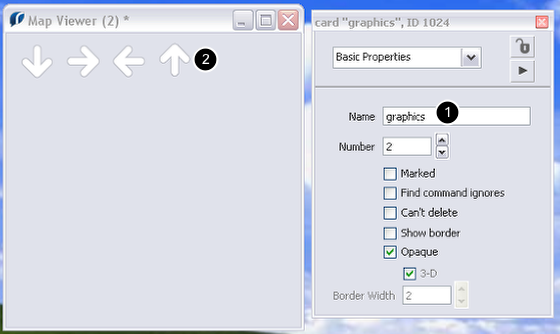
Now lets add icons to our buttons so they look a little nicer. Add a new card to store the button icons, use the New Card option in the Object menu and name it graphics(1) then import the graphics you want to use as button icons(2) in the same way we imported the map image in the second step. Add button icons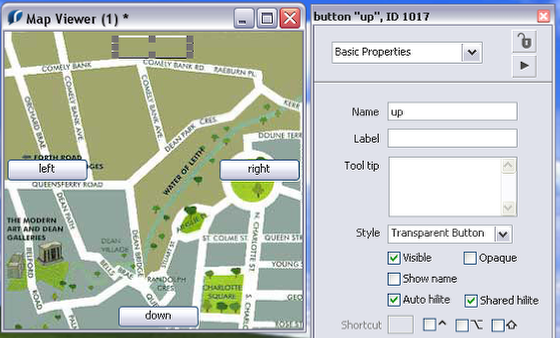
Go back to the main card and select the up button. We are going to add the up arrow as an icon so we need to turn off the opaque and show name properties in Basic Properties. Add button icons (2)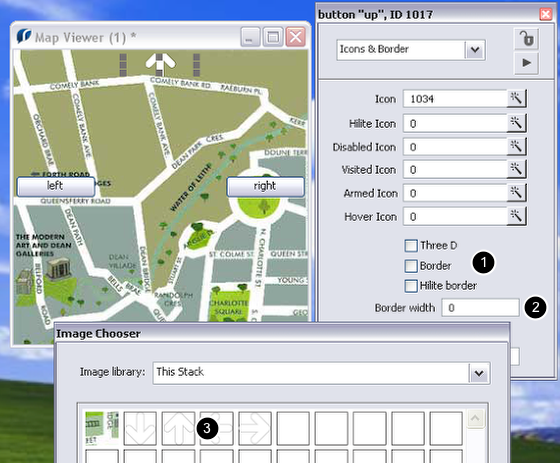
Now go to Icons and Borders, turn off the Three D, Border and Hilite Border properties (1), set the Border width to 0 (2) and use the Icon picker to select the up arrow graphic we just imported (3) Repeat this for the other buttons, then play around with the size and position of them until you are happy with how it looks. Scripting the down button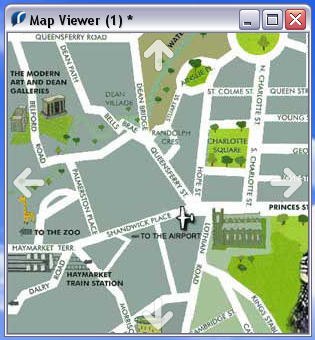
Now that we have our buttons in place it's time to make them do something. What we want our buttons to do is to mimic using the scrollbar to scroll the contents of the group, to do this we set the vScroll and hScroll properties of the group. The vScroll is the amount in pixels the object has been scrolled down, the hScroll is the amount in pixels that the object has been scroll right. If the vScroll or hScroll is zero, the object has not been scrolled. Lets start with the down button on mouseUp Every time the down button is clicked we add 10 to the vScroll of the map display group so the map will scrolls down by 10 pixels. Scripting the other buttons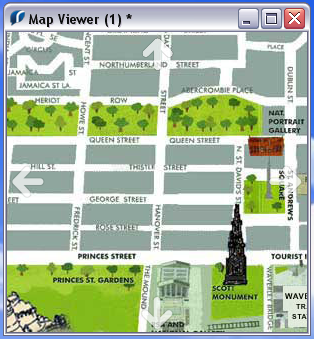
Now all we need to do is script the other 3 buttons in the same way. The up button also uses vScroll but right and left use hScroll as we want the map to scroll horizontally when using those buttons. Now we can navigate around our map until we can see Thistle Street again.
| 

|