Port Rev Calculator to Windows Mobile
Get your hands dirty creating your first Windows Mobile App!
Introduction
Over the course of 2010 we at RunRev will be working hard to make the Rev platform even more ubiquitous by porting our technology to the major mobile platforms: Windows Mobile, Maemo and iPhoneOS.
In this article I will be using a prototype engine for Windows Mobile to show how easy it is to get a simple Rev application running on a portable device. The prototype is being made available to anyone who buys (or has bought) the revMobile pre-order.
The article assumes you are already up and running with the prototype, and have worked through the Hello World example in the guide provided with it.
Note: Make sure you have revision 2 of the revMobile pre-alpha (uploaded 2010-02-03)
The Rev Calculator
Rather than re-creating the wheel in this tutorial, I decided to re-use a simple little stack I found buried in the Rev Resource Center. The Rev Calculator has been shipped with the Rev IDE as an example for many years (since 2003 if you believe the copyright on the about screen!) and makes an ideal first mobile app example.
So, before going any further first furnish yourself with a copy of the calculator. This simple command from the message box should do just that:
go stack url "http://www.runrev.com/newsletter/february/issue86/OriginalCalculator.rev "
(This stack is unchanged from the version that has been a part of Rev for years... Absolutely no tinkering has been done!)
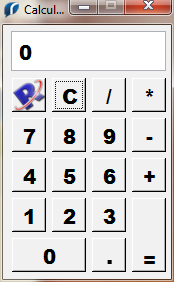
The most important thing to do next is to save this stack locally on your machine - the reason for this is that the revMobile plugin can only act on stacks that are on disk. At this stage you should happily be looking at the following stack:
Trying it Out
Okay so now we have the stack we'd like as a mobile app, the question is what we need to do to get it to work... Wouldn't it be nice if it just worked without us doing anything? Well, let's find out what happens when we try!
Open up the revMobile plug-in (from Development > Plugins > revMobile Plugin ), and click the New Project button. Choosing the Calculator stack will cause it to be marked with the revMobile property set and allow the plugin to identify it in the future. Next remember to save the stack again, to ensure that the property stays with the stack:

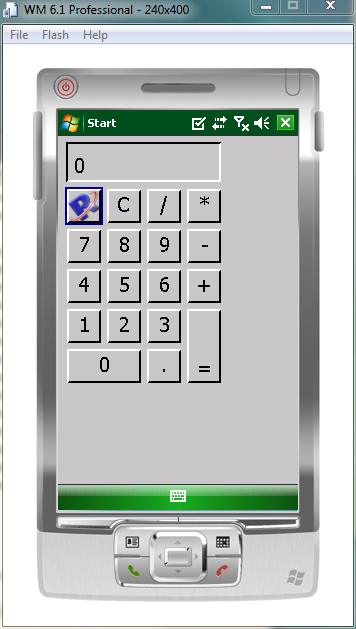
Obviously before we can try out the stack we need a device to deploy onto. Make sure you have one selected (by double-clicking on the Device Connection Display ), and then click Start . In a few moments, you should see the calculator running:

Does it Work?
The answer to this has to be a resounding yes! The calculator functionality works perfectly either from clicking on the buttons with the stylus (i.e. mouse), or by bringing up the soft keyboard and using the keys - just like in the Rev IDE.
So, the functionality seems to be fine but there are couple of superficial things that can be immediately seen:
• the image is missing from the About button
• the whole thing doesn't look very Windows Mobile-like theme wise.
Perhaps more importantly, the calculator is only occupying a portion of the screen. Given that we have to use a stylus to press those buttons, it would make much more sense if the app filled the screen.
We will deal with all these issues next.
Sorting out the Missing Image
The image missing from the button may, at first glance, seem a little strange - after all it appears fine in the IDE. On closer inspection it appears the image is actually an icon of the button - the icon is 210095. The problem, then, is simple: this image exists in a standard library but this is not something the revMobile plugin knows about.
For the current version of the plugin, therefore, it is necessary to ensure that all your resources are either included in the mainstack, or copied across and referenced as files.
For this case, the easiest thing to do is just to copy in the image we want:
• Go to Development > Image Library, choose the little R image and choose Place Image . This will copy the resource onto the card.
• Return to the calculator stack, and make the just placed image invisible.
• Finally, update the image id of the offending button - simply use the Image Chooser for the button icon property and make sure you choose from This Stack .
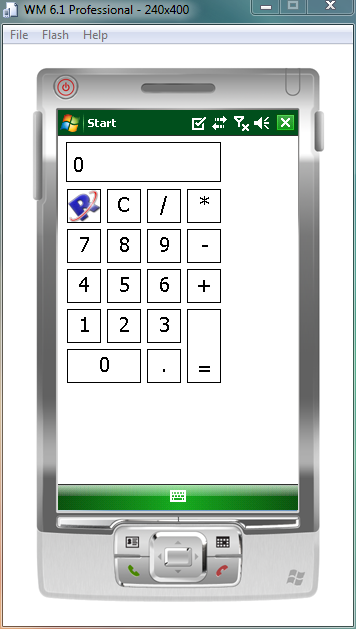
If you now save your stack, and then restart it in the revMobile plugin (just click Start - it will prompt to quit any currently running project on the device) you should see the image restored to its desktop glory:
A Small Facelift
As mentioned previously, the default look of the app isn't very Windows Mobile - which prefers single 1 pixel black borders and a white background in its interface elements. This prototype version of the engine has not had any changes made to its theming engine so it isn't perhaps so surprising that it doesn't know how to look like we'd like it!
Fortunately, a good approximation to the standard device theme can be made by a few simple property changes:
• Set the background color of the stack to white - this eliminates the dull gray.
• Next change all the control borders to be non-three-dimensional, with a width of 1
• Finally make sure the controls have Show focus border turned off
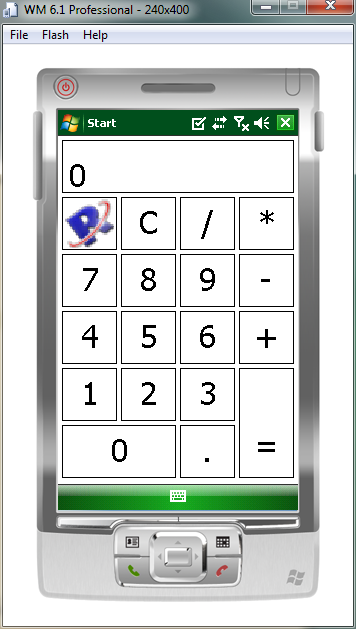
Saving your stack and re-running it on the device should result in a much more Windows Mobile-esque app staring at you:
Filling the Screen
As currently designed, our calculator stack is a fixed size. This is fine on the desktop but, as can be observed, is a bit of a problem on our device. Another issue that crops up if you play with different emulators/devices is that the screen size and orientation can change! This means we need some way of relaying out the card to account for these differences.
Just as in the desktop version, a size change to the stack will be communicated by means of a resizeStack message. Thus to make our calculator more mobile friendly, all we need is to add one of those to the card script:
on resizeStack
      -- We divide the area we have into a 5x5 grid.
      local tCellWidth, tCellHeight
      put ( the height of me - 7 * 4 ) div 6 into tCellHeight
      put ( the width of me - 5 * 4 ) div 4 into tCellWidth

      -- Position the result field
      set the height of field "Result" to tCellHeight
      set the width of field "Result" to 4 * tCellWidth + 3 * 4
      set the topLeft of field "Result" to 4 , 4

      -- Set all the positions of the cells
      local tRow, tColumn
      put 1 into tRow
      repeat for each line tCellRow in \
                    "About,Clear,/,*" & return & \
                    "Number 7,Number 8,Number 9,-" & return & \
                    "Number 4,Number 5,Number 6,+" & return & \
                    "Number 1,Number 2,Number 3,=," & return & \
                    "Number 0,,Decimal,"
            put 0 into tColumn
            repeat for each item tCell in tCellRow
                  if tCell is not empty then
                        if tCell is "Number 0" then
                              set the width of button tCell to tCellWidth * 2 \
                      + 4
                        else
                              set the width of button tCell to tCellWidth
                        end if
                        if tCell is "=" then
                               set the height of button tCell to tCellHeight * \
                      2 + 4
                        else
                              set the height of button tCell to tCellHeight
                        end if
                        set the topLeft of button tCell to \
                                      4 + (tCellWidth + 4 ) * tColumn, \
                                      4 +(tCellHeight + 4 ) * tRow
                  end if
                  add 1 to tColumn
            end repeat
            add 1 to tRow
      end repeat

      -- Set the size of our about icon to the cell size
      set the rect of image 1 to 0 , 0 , min (tCellWidth, \
          tCellHeight) - 4 , min (tCellWidth, tCellHeight) - 4

      -- Finally set the textSize to something more appropriate
      set the textSize of this card to tCellHeight * 3 / 4
end resizeStack
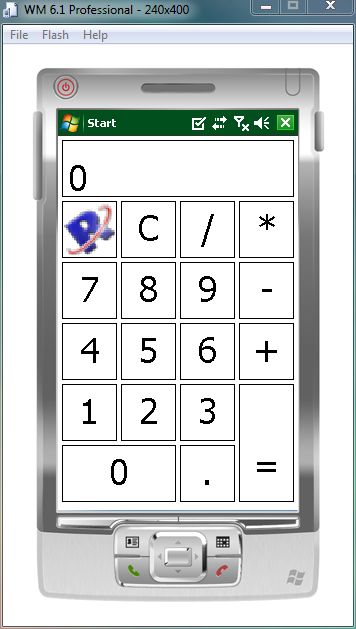
Applying this script and re-running on the target device results in something much more usable - regardless of device (or orientation!):
One Final Tweak
If one stops to ponder for a second, its easy to see that there is one element of redundancy in our current layout - the Windows Mobile menubar at the bottom. Obviously for many applications access to the soft-keyboard is important - but for our calculator its pointless... After all, why do you need access to much smaller buttons that have the same effect on the app as our nice big ones?
To eliminate this piece of furniture is easy - we just use the hide menubar command in a preOpenCard hander:
on preOpenCard
      hide menubar
end preOpenCard
Adding this to our card script, alongside our resize stack handler then gives us the maximum possible screen-area we could want for our calculator:
Summary
Hopefully this article has given you a basic idea of what it takes to start developing mobile applications with the Rev platform. Even though the pre-alpha is in no way complete, it was easy to take a Rev stack and make it run well on a Windows Mobile device. The final stack (after all the tweaks) can be found here:
go stack url "http://www.runrev.com/newsletter/february/issue86//MobileCalculator.rev"
Happy mobile coding!
|