
| Issue 150 | March 22nd 2013 | Contact the Editor | How to Contribute |
|
| ||
|
SheepHerder Lesson 1 This is the first in a series of 5 lessons and videos, published here for free by kind consent of the Management. You can see the rest of the lessons and watch all the videos including the one that accompanies this lesson, when you sign up to the SheepHerder Academy, here. The premise of the game is to place as many sheep as possible in a sheep pen before the timer reaches 30 seconds. The counter shows the number of sheep increasing as they are cleared from the screen. When the timer runs out, a message is displayed on screen showing the amount of sheep collected. In this lesson, we will be focusing on creating
Where to get Help
If you have questions or want to find out more, you can visit or post questions in our forums here: Create Your Stack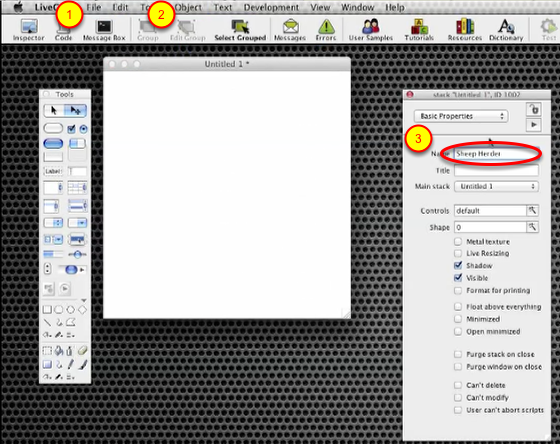
Start by opening LiveCode, and go to the File menu (1). Choose "New Mainstack". Now open the Property Inspector, by going to the Object menu (2) and choosing "Stack Property Inspector". Tip: you can also open the Property Inspector by double clicking on the stack window. Enter the name "Sheep Herder" in the Name field of the inspector (3). Color the Background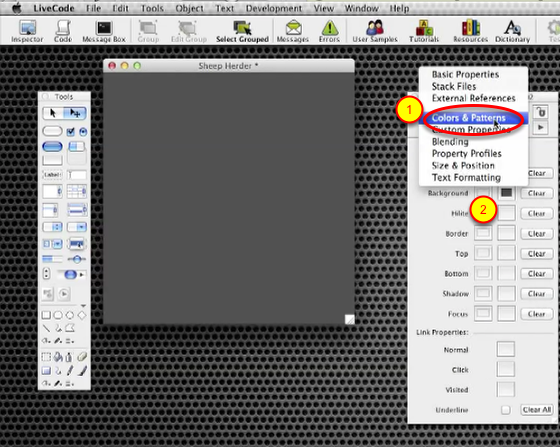
From the drop down menu at the top of the inspector, choose "Colors & Patterns" (1). Click in the box on the right of "Background" and choose a color from the color picker (we're using gray) for your background (2). Size Your Stack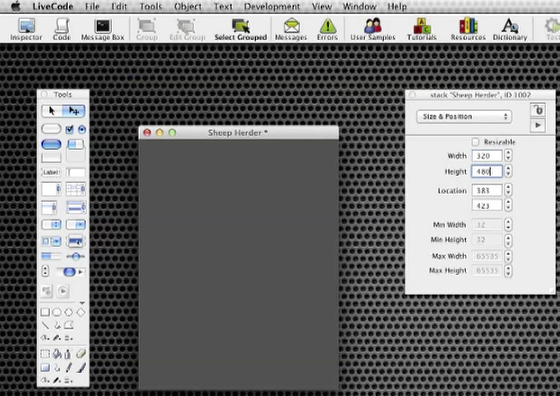
Now choose "Size and Position" from the drop down menu in the Inspector, and enter 320 for the width and 480 for the height. These are the dimensions of the screen for the original iPhone. Add the Sheep Pen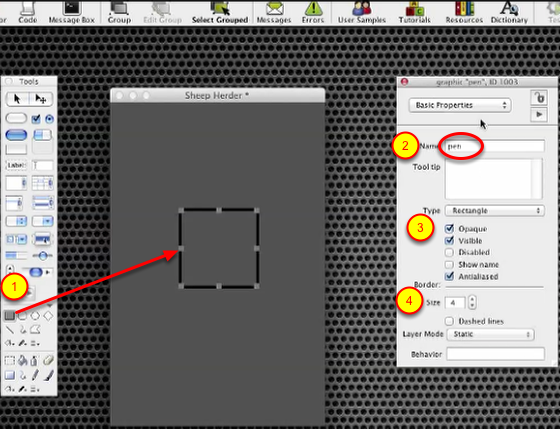
Create the pen by dragging out a rectangular graphic from the Tools Palette (1). Name this pen (2) and set its properties to Opaque, Visible, and Antialiased (3). Set the border size to 4 (4). Color the Graphic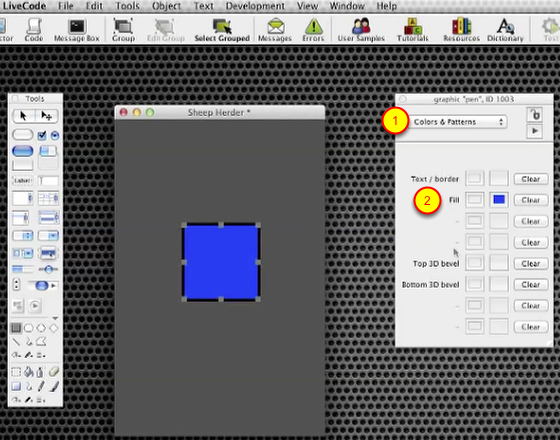
Color the sheep pen by going to Colors & Patterns in the Inspector (1) and clicking in the right hand box opposite "Fill" (2) to pick a color from the color wheel. Add the Control Bar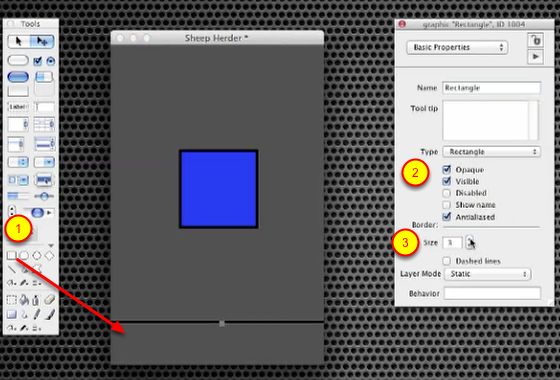
Drag another rectangular graphic from the Tools Palette and size and position it as shown at the bottom of your stack window (1). Set it to opaque (2) and adjust the border size to 3 (3). Now go to colors and patterns in the Inspector, and set the color to a lighter grey than the background. Add a Start Button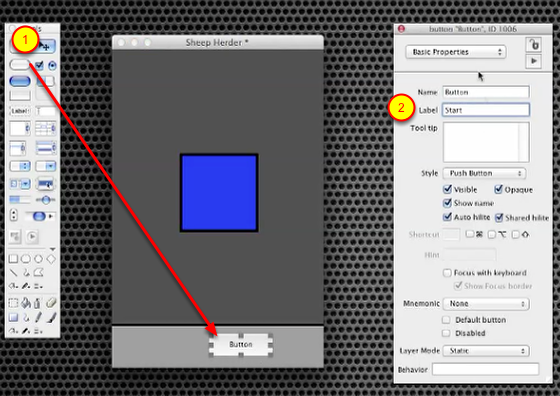
Now we need a Start button, to start and stop the game. Drag out at button from the Tools Palette (1), adjust the size using the drag handles, and enter "Start" in the Label field of the Inspector (2). Note: the Name of the button is what you refer to it as in a script. The Label of the button is what is shown on the button. Set the Text Style
With the button selected, select "Text Formatting" from the drop down menu in the Inspector (1). Click "B" to set the style of your Start label to Bold (2). Add Label Fields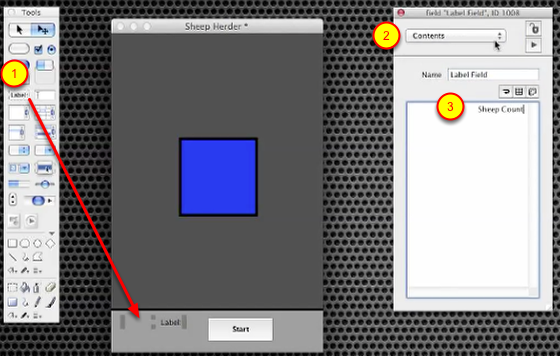
We need some labels for our timer and sheep count fields. Drag out a label (1) and go to the Contents pane of the Inspector (2). Enter "Sheep Count" in the contents field (3). Now set the text style to Bold and Underline, in the Text Formatting pane, and set the text color to white, in the Colors & Patterns pane, so that it shows up well against the background. Copy this field, move it to the other side of the control bar and change the contents in the Inspector to "Timer". Tip: you can copy and paste the field, or for a quick duplication, hold down the "alt" button and drag another copy off the field. Add Count Fields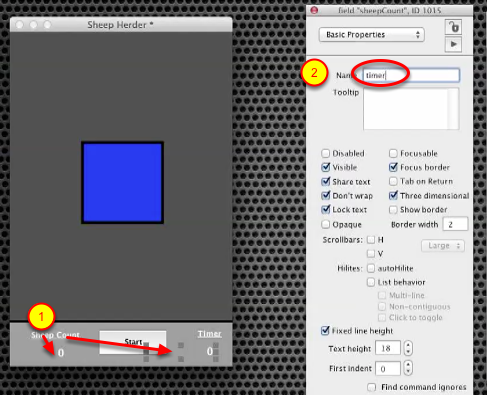
Duplicate the Sheep Count field twice more (1). Position 1 field under "Sheep Count" and the other under "Timer". Set the contents of both to zero in the Contents pane, and remove the Underline in Text Formatting. Name the field under Sheep Count "sheepCount" and the field under Timer "timer" (2). Group the Objects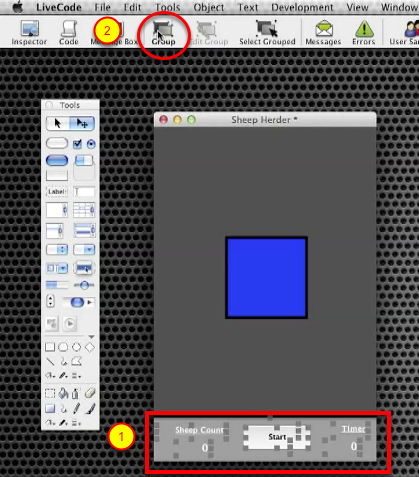
So that we can apply actions to all these buttons and fields at once, we are going to turn all the objects in the control bar into a Group. To do this, select all the objects (1) by dragging over them, and then click on the "Group" button in the toolbar (2). Name the group "groupControls" in the Property Inspector. Open the Code Editor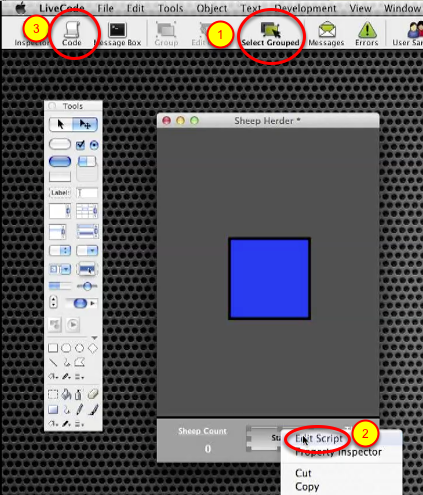
We want to add a script to the Start button. To be able to select the Start button you first need to click on "Select Grouped" in the Toolbar (1). Now right click on the Start button, and open the Code Editor by choosing Edit Script (2). Tip: you can also open the Code editor from the Toolbar by clicking on the "Code" icon (3). Write Some Code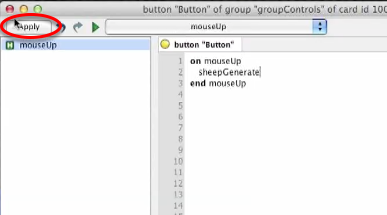
In the Code Editor you will see you already have "on mouseUp" and "end mouseUp". Between these enter sheepGenerate, so your first handler looks like this: on mouseUp A handler is a statement that handles something for you. This one is handling the input that happens when you release your mouse. sheepGenerate is another handler we are about to write, that will create sheep on screen when you click on the Start button. Click on Apply to apply the script to your button. If you haven't already, now would be a good time to save your work, by going to File/Save and giving your stack a name. Create a Sheep Template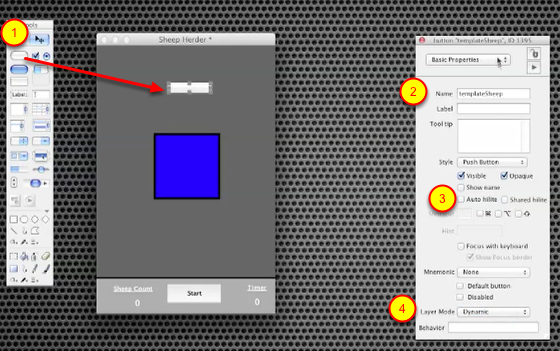
Our sheep are simply buttons, with some properties set. Later on in the course we'll skin these buttons so that they look like sheep on the screen, but for now we're just going to get the behavior working correctly, and use white square buttons to represent sheep. Drag out a button (1), and name it "templateSheep" (2). Turn off Auto hilite and Shared hilite (3), and set the Layer Mode to "Dynamic" (4). Set Properties on the Sheep Template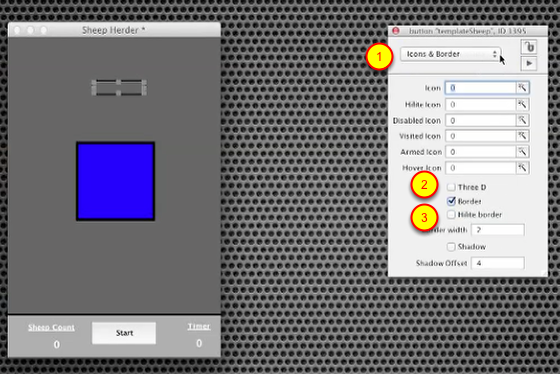
In the Icons and Border drop down menu (1), uncheck Three D (2) and Hilite border (3). In Colors & Patterns, set the fill color to white. Custom Properties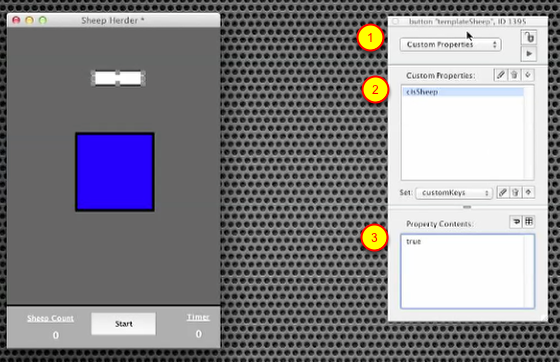
Now go to the Custom Properties pane in the Inspector (1) and enter "cIsSheep" in the top pane Custom Properties (2), and "true" in the bottom pane Property Contents (3). Later on we are going to use this in our code. A custom property is a way of telling LiveCode that this particular object should behave in a certain way - in this case, like a sheep. Our code will later define what this behavior will be. Set Width and Height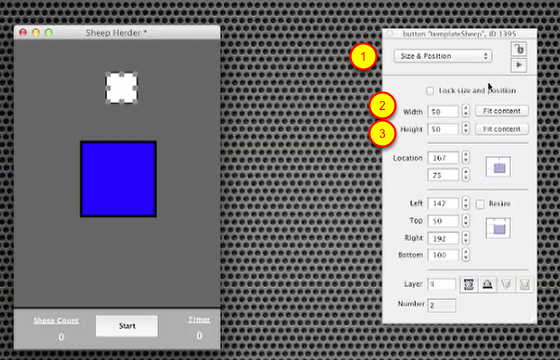
We're going to make this sheep square, so go to the Size & Position pane (1) in the Inspector, and enter 50 in the width field (2), and 50 in the Height field (3). Lastly, make the template sheep invisible, by going to the Basic Properties pane and unchecking visible. Generate Sheep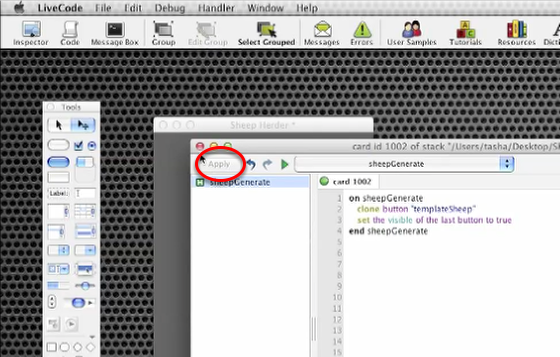
We're now going to create the sheepGenerate handler, as a card script. To do this, open the script for the card, by going to the Object menu in LiveCode and selecting "Card Script". Note: if you're not sure what the card is and why we are putting the script on it you might find this lesson helpful: http://lessons.runrev.com/s/lessons/m/4603/l/44035-the-structure-of-a-livecode-application Once you have the card script open, enter this code: on sheepGenerate We are telling LiveCode what to do when we send the sheepGenerate command. We want it to clone our sheep, and make them visible. Don't forget to click Apply in the top left corner, then close the editor. Save your stack, as we will be building on it throughout this course. Run it!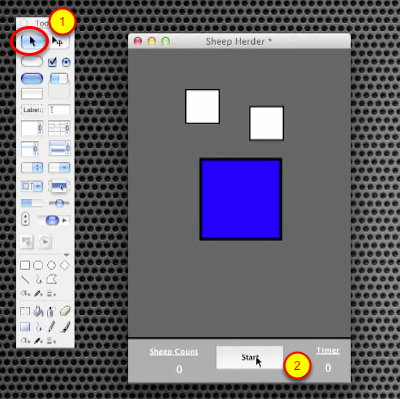
Let's try it out! Switch into Run mode (1) and click on your Start button (2). You may not immediately see anything happen, because your new sheep is being created on top of the existing sheep - you can check sheep are being created by switching back into edit mode and dragging the "sheep" square to a new location. That's it for this lesson. In the next lesson we'll look at
| 
Tweet
|