| Issue 99 | oct 28th 2010 | Contact the Editor | How to Contribute |
|
| ||
|
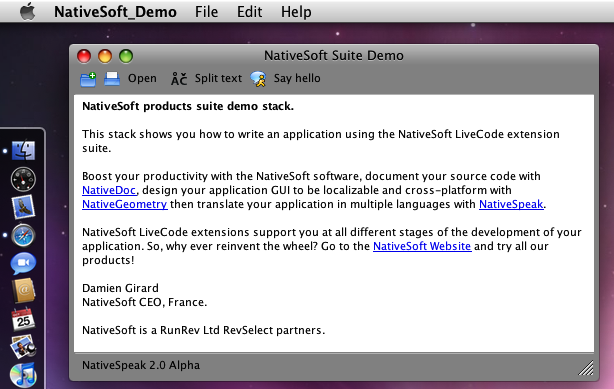
Cross Platform Geometry In order to create a cross-platform application, it is important to begin with the right tools and the right method - this is not only true for cross-platform development, but for all development. In this article I will explain how I begin the development of my LiveCode applications with the focus on getting it right across different platforms. Before AnythingBefore anything, we have to think about what we want to do. For this tutorial I chose a stack that I made in order to test all my tools, NativeDoc, NativeGeometry and the upcoming NativeSpeak. This stack can be downloaded here: http://www.nativesoft.fr/downloads/NativeGeometry/NS_Demo.livecode, but the goal of this tutorial is that you will be able to make it yourself. So, I wanted to create quickly an application with a menubar, a toolbar, a statusbar and so that we don't just have an empty stack, a field with some contents :) Here are some screenshots of the end result we are aiming for, on Mac, Windows and Linux: On MacOS X 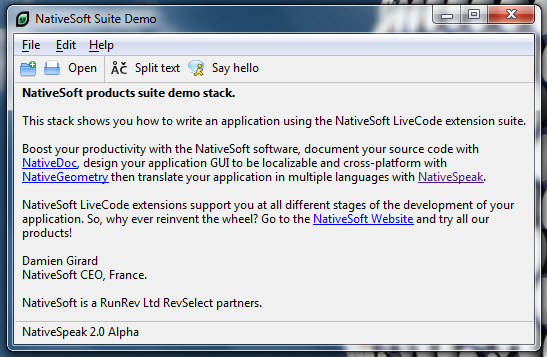
On Windows 7 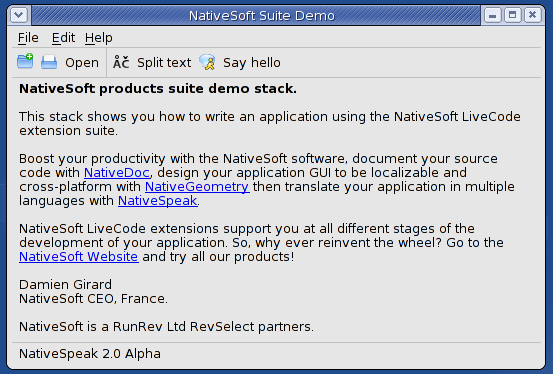
On CentOS 5 As you see, the application looks like a native application on all platform, only expert eyes can see that it is a LiveCode application on Windows and MacOS X. The Tools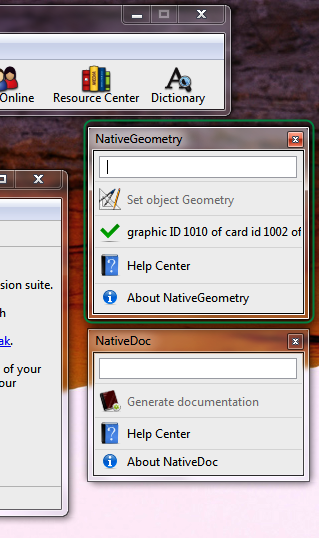
To do this tutorial, you need NativeSoft NativeGeometry. As of version 2.1 NativeGeometry has a new evaluation edition that enables you to try it without any limitations. (There are just some nag screens). NativeGeometry is a geometry manager for LiveCode. If you have not already downloaded NativeGeometry, simply paste the following code in your LiveCode message box: Or if you prefer to download manually NativeGeometry, go to http://www.nativesoft.fr/download First - The MainstackCreate a new mainstack "File->New Mainstack". Second - The Menu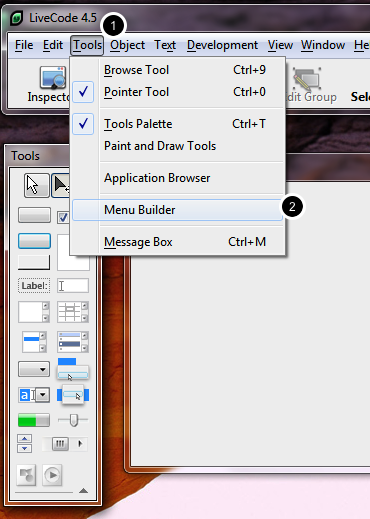
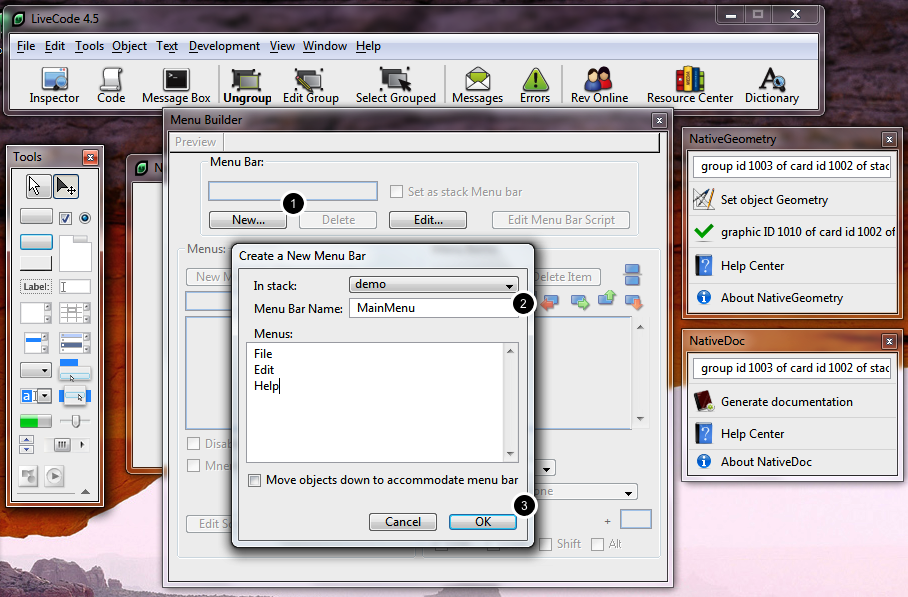
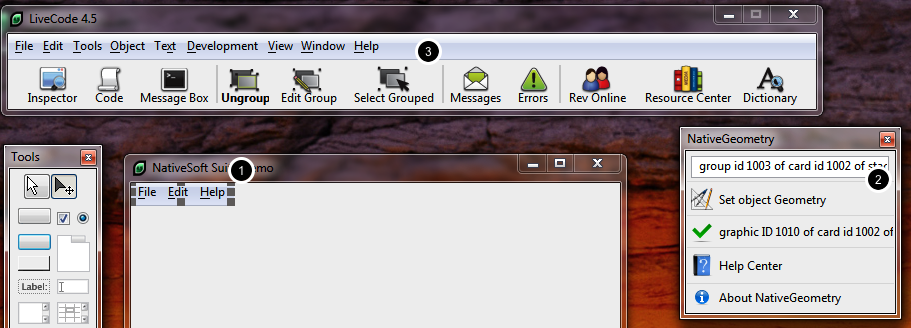
To create the menu, we will not re-invent the wheel, we will use the LiveCode Menu Builder. In the menu builder, click "New" (1) in order to create a new menubar. Leave the default menu entry and click "OK" (3). 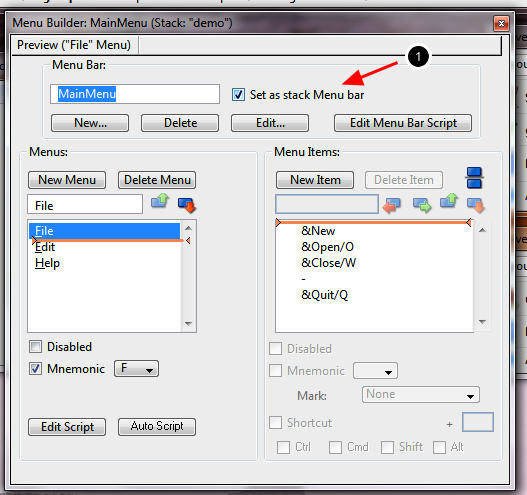
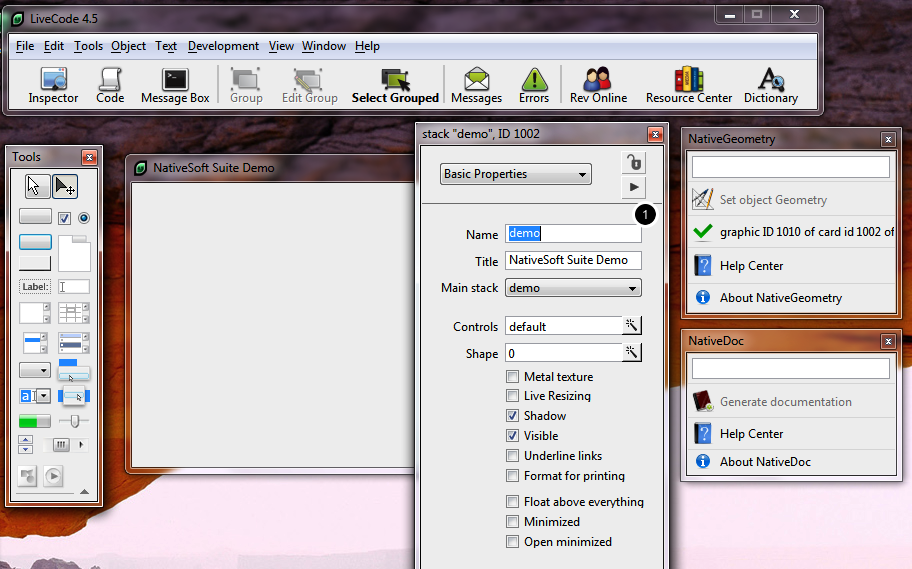
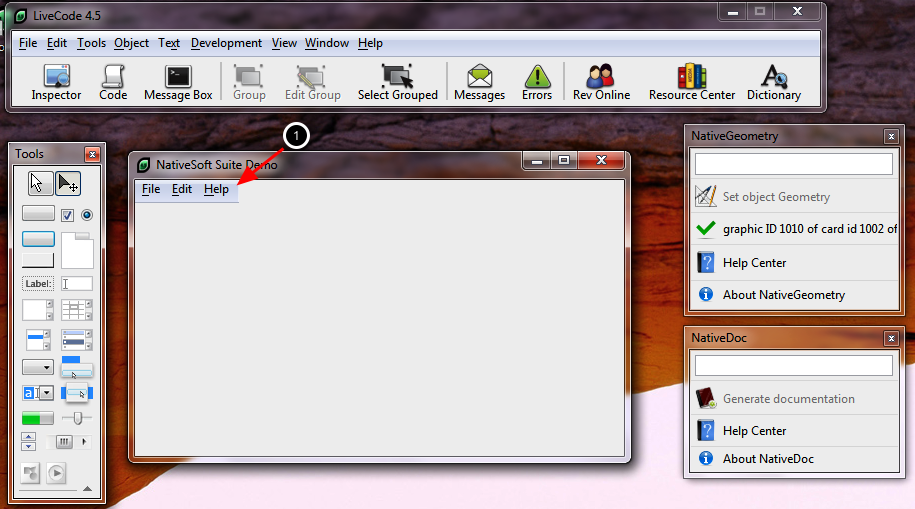
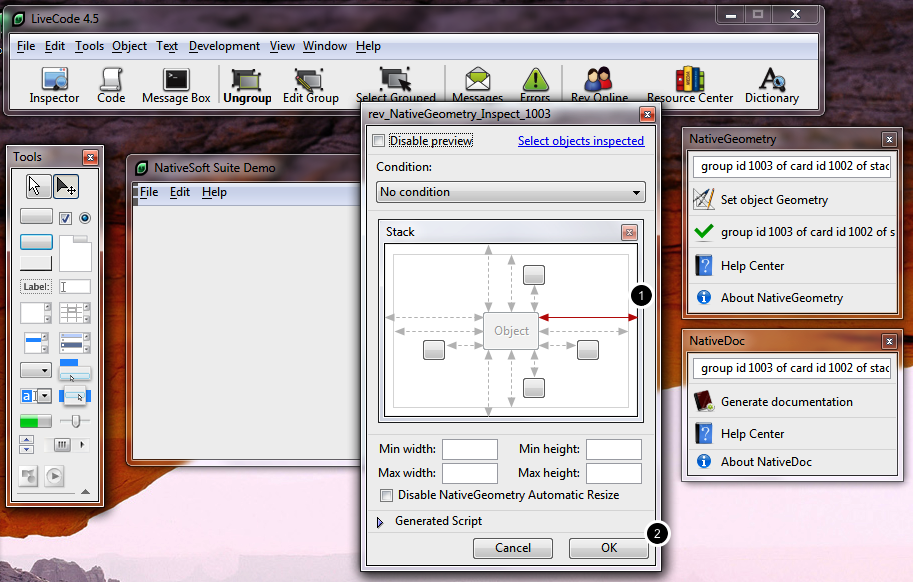
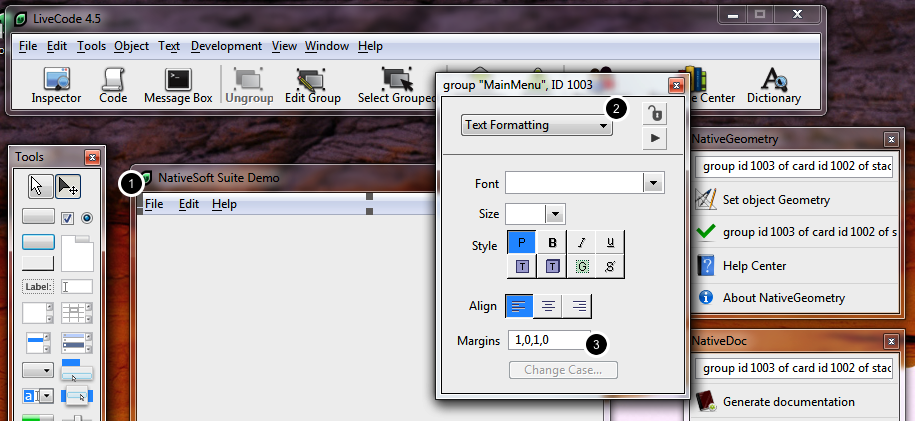
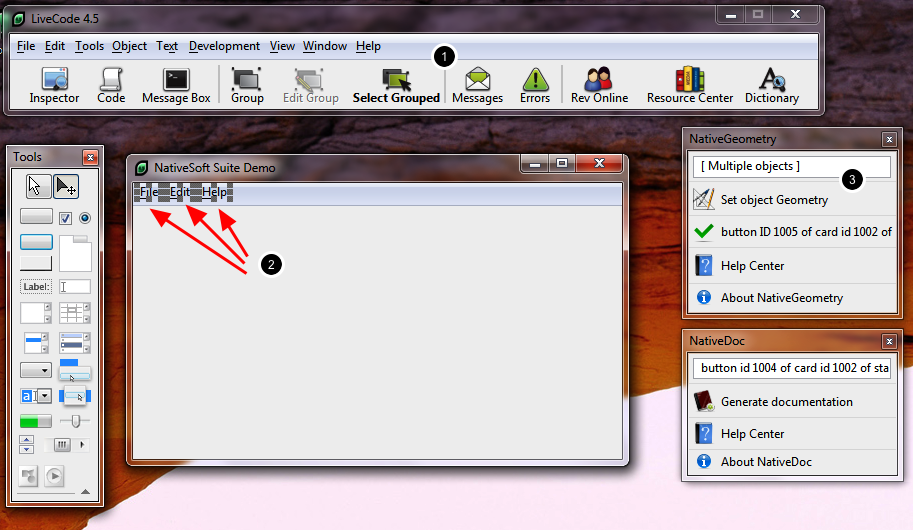
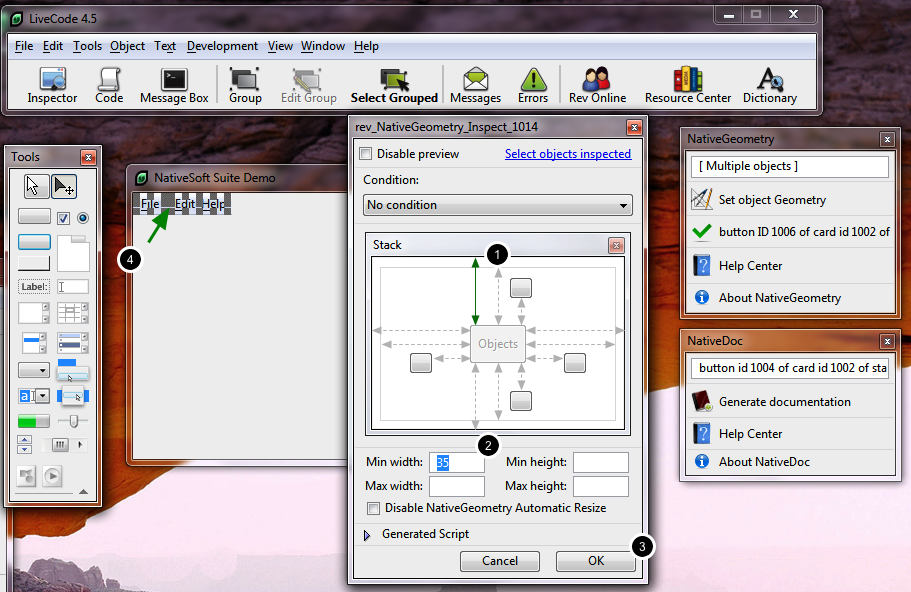
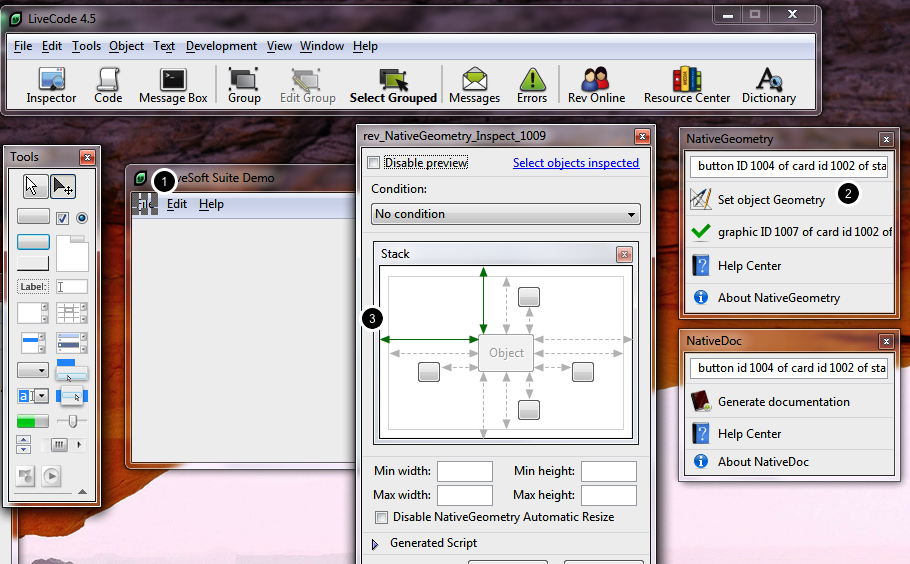
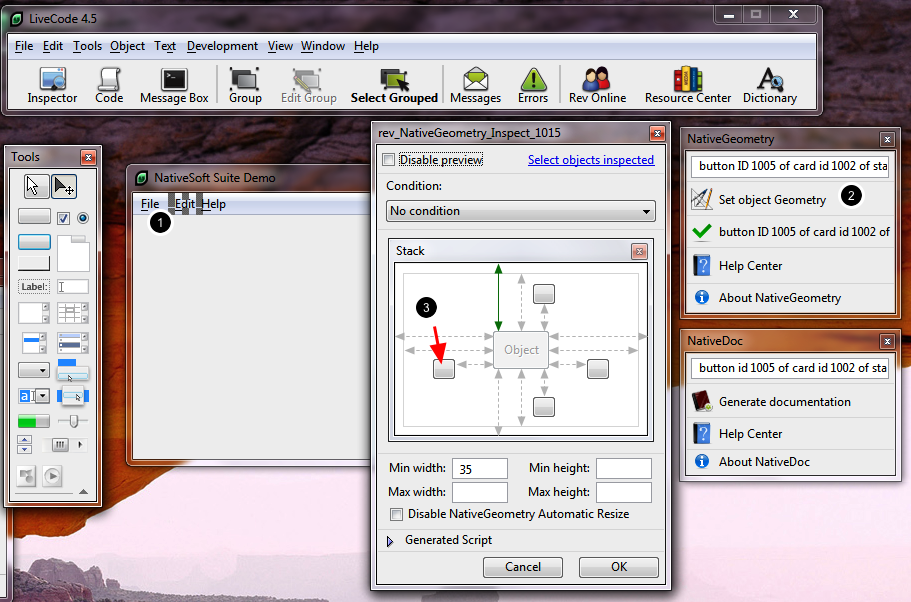
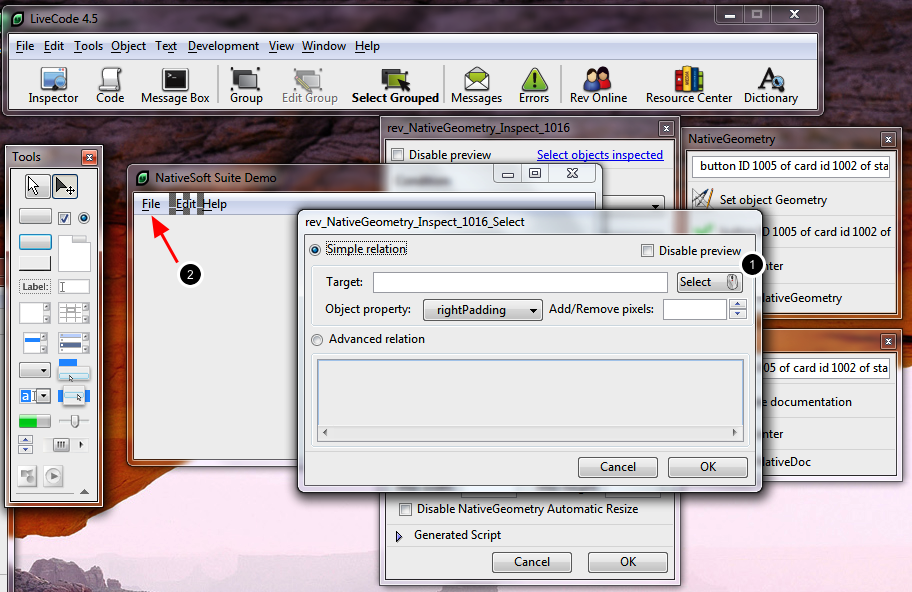
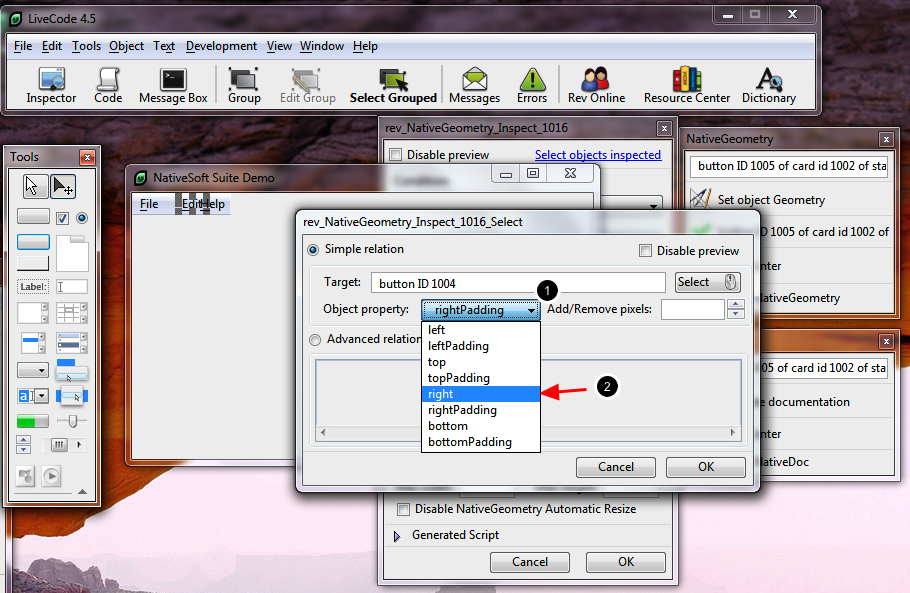
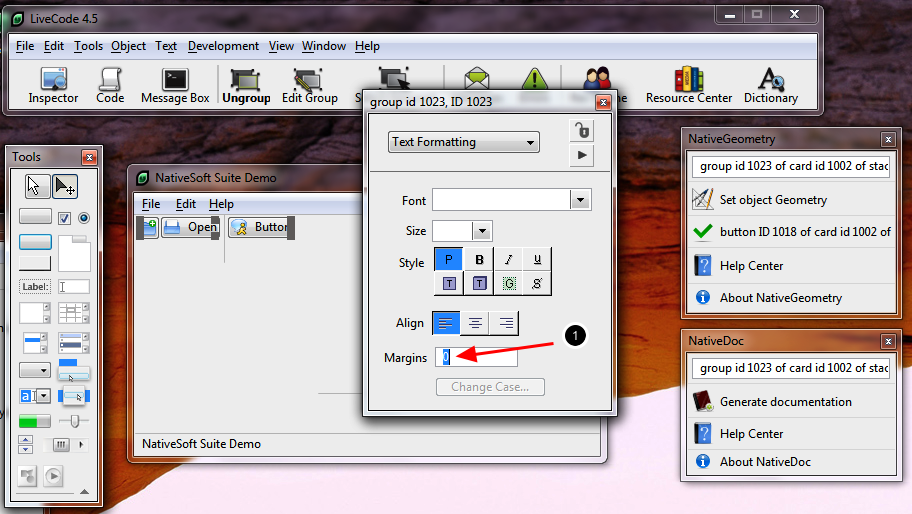
If you are not on MacOS X: If you are on MacOS X: The new menubar has been created, but as you see this is not looking aesthetically beautiful. We will use NativeGeometry to solve this problem. The following operations will set the geometry of the menubar group. Select the menubar group (1) (be sure that "Select Grouped" is not activated (3)), then click "Set object Geometry" (2) in the NativeGeometry toolbar. Double click (1), in order to tell to NativeGeometry to resize the right of the object to the right of the stack. Tips: To make the menu group look far better on Windows, you have to set its margins to "1,0,1,0". The following operations will make the menubar good looking, localizable and cross platform. Activate "Select Grouped" (1), and select the button "File", "Edit" and "Help" (2) (hold the shift key to select multiple object), then click "Set object Geometry" (3). Click (1) in order to set the top of previously selected object to the top of this stack. As you see, the size of objects "File", "Edit" and "Help" have changed (4). This is normal, NativeGeometry by default automatically resizes any objects to fit to their best width/height for the current platform! Now select button "File" (1), set its objects geometry (2) then set its left to the left of this stack (3). Save mofications. Select the button "Edit" (1), set its objects geometry (2) then click on the button (3). Click (1) then click the button "File" (2). Now that the object has been selected, you need to choose what property NativeGeometry will use, in our case we want the right. So click (1) and select "Right" (2). Click "OK" and "OK" to save the geometry relations. 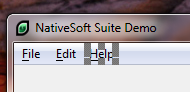
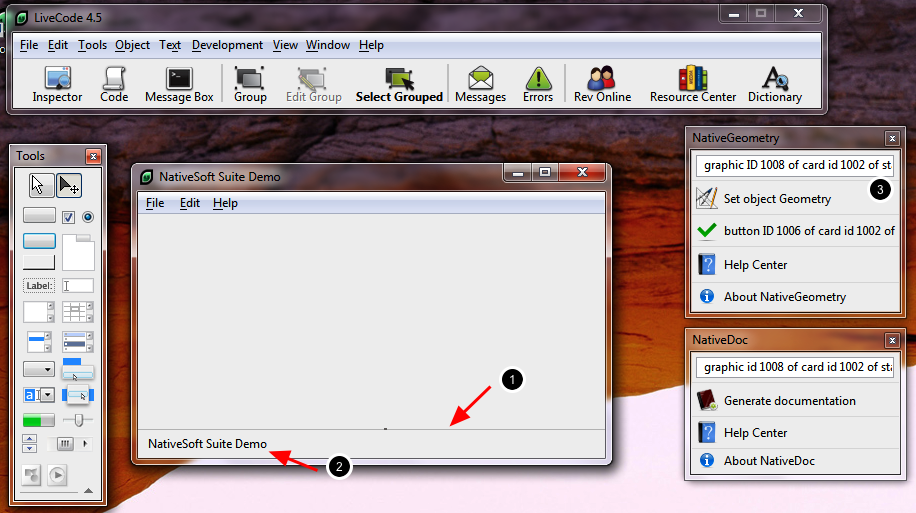
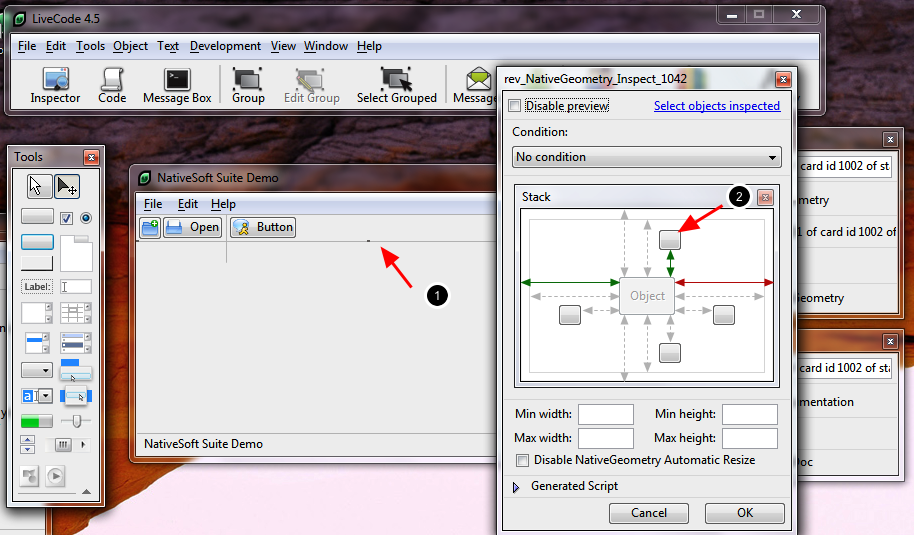
Repeat the step above, but this time we will do the "Help" button and this button has to be to the right of the "Edit" button. The "hardest" step is now over, if you do all your menus like this, they will be localizable, cross-platform and more. With NativeGeometry, in only few minutes the work is done. Third - The StatusbarPlace a line on the stack, set its foregroundcolor to "192,192,192" (1). Finally, select the graphic line (1) and click "Set object Geometry" (3). 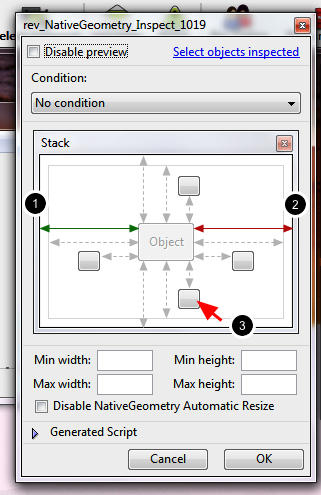
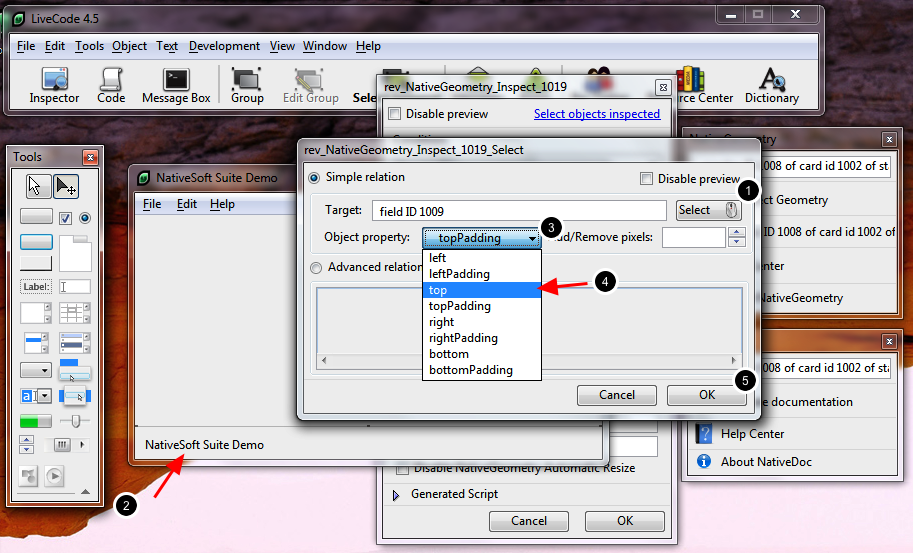
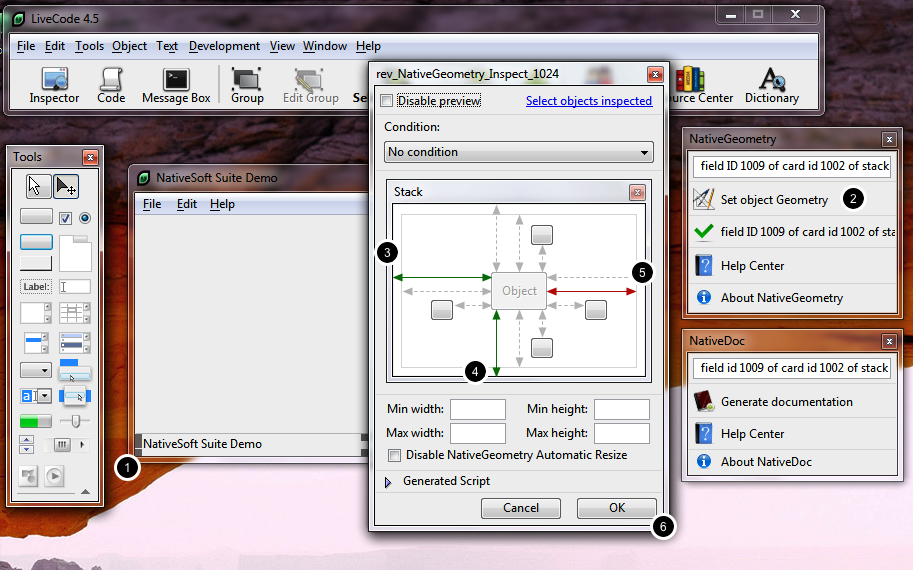
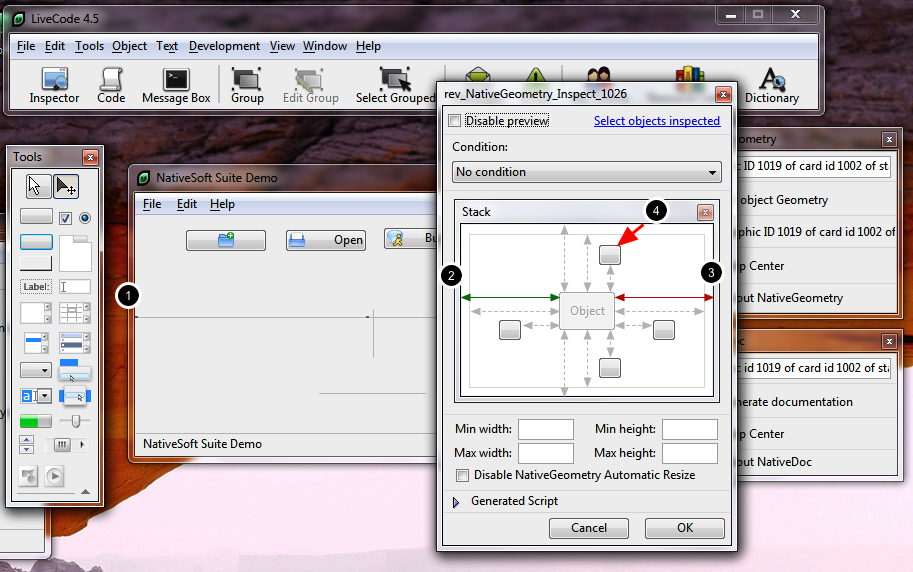
Click (1) to set the left of the graphic to the left of the stack, double click (2) to resize the right of the graphic to the right of the stack and finally click the button (3) to set the bottom of the graphic to the top of status field. Click "Select" (1) and select the status field (2), then set the property to be read (3) to "top" (4). Click "OK" (5) and "OK" to save the relation. Select the status field (1), set its object geometry (2). Click "OK" (5) to save the geometry relation. Now we have a menubar and a status bar, next we will attack the toolbar part. Note: From here on I will assume you have understood from the above how to set object geometries with NativeGeometry, so I will skip a few details. If you get lost, please refer to the earlier steps in this tutorial. Fourth - The Toolbar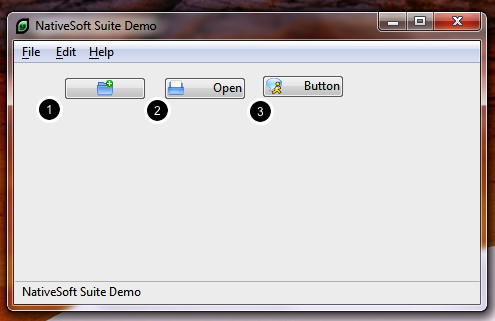
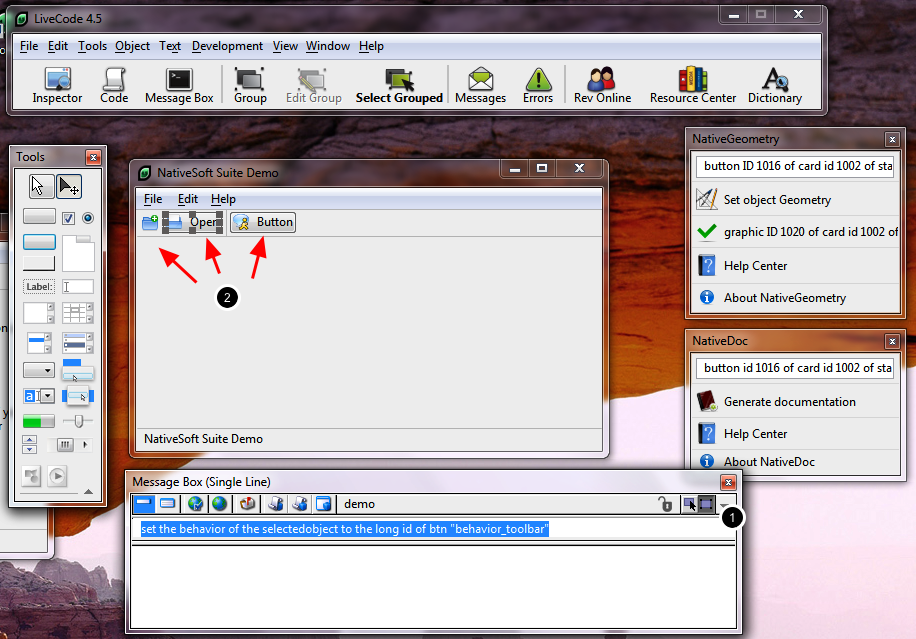
First, you need to find three icons in 16x16, google is a handy resource to quickly find those. Then, import them into your stack, set them as invisible and create three buttons as you see in the screenshot. Note: 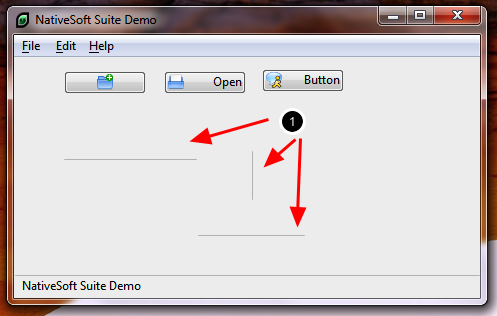
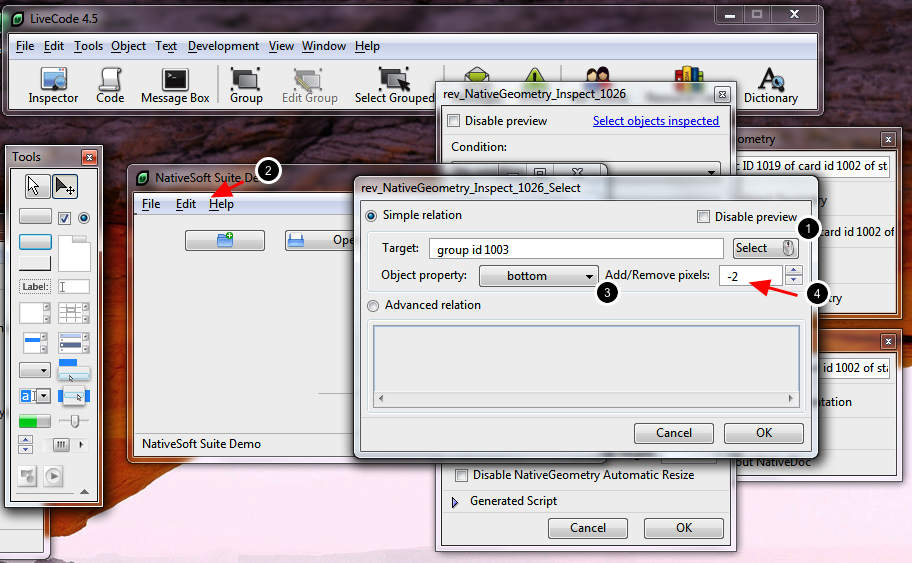
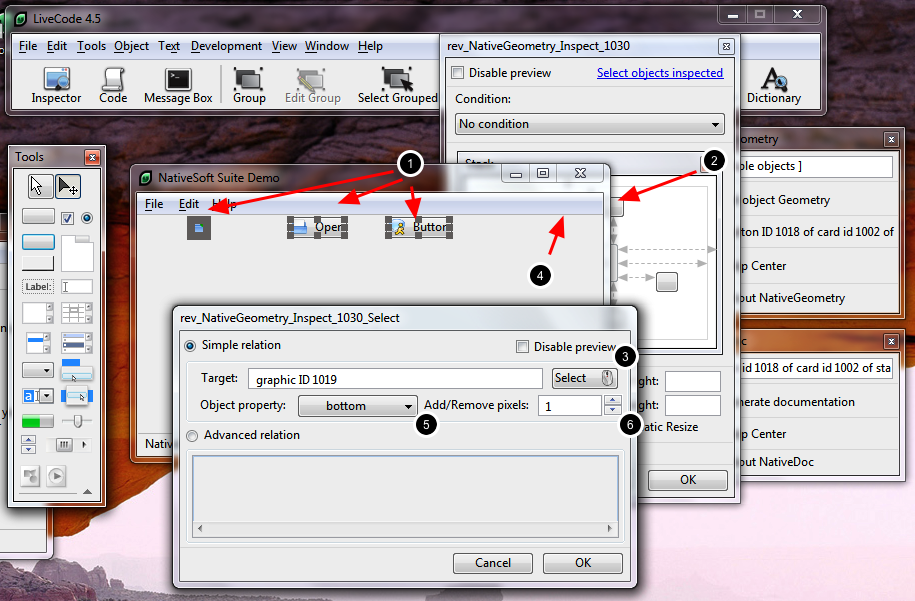
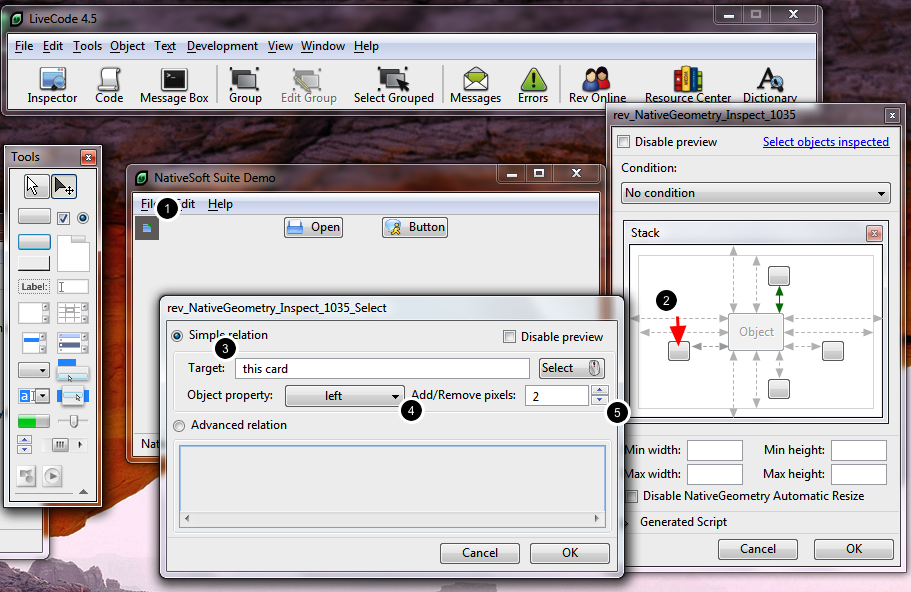
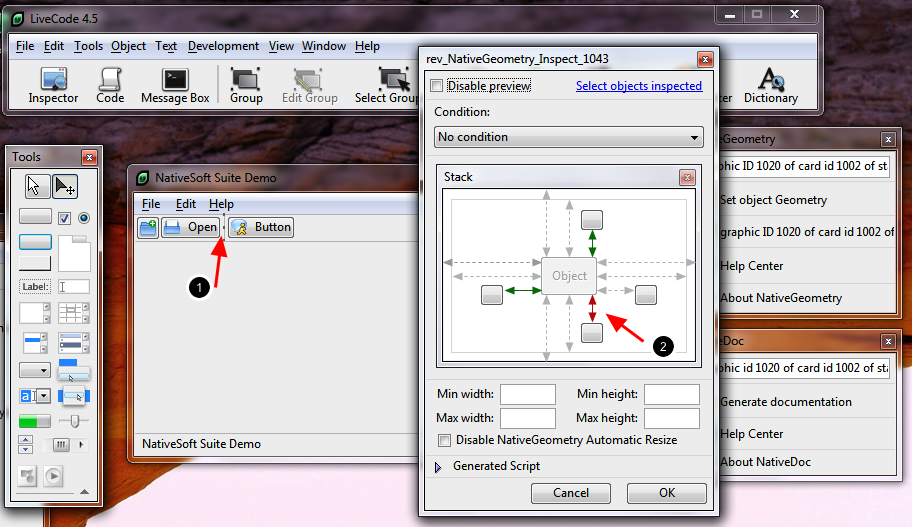
Create now three graphics, two horizontal and one vertical and set their foreground color to "192,192,192". (1) Note for MacOS X: Horizontal graphics will be hidden on MacOS X, but on Windows/Linux they must be here in order to have a consistent GUI. (If you look at the first screenshot graphics are hidden on Mac OS X). Select one of the horizontal graphics (1), set its left to the left of the stack (2) and resize the right to the right of the stack (3). Select (1) the menubar group (2), and use the bottom property (3) and remove 2 pixels. (4). This little tricks make the graphic invisible on Windows Vista/7, but on Linux/Windows XP the graphic will be present. We will set the top of the three buttons to the bottom of the previously set graphic. Select the three buttons, set their geometry top relative to an object (click button (2)), select (3) the graphic that we have placed before (4), set the read property to "bottom" (5) and add one pixel. (6) We will set now the left of the first button to the left of this card + 2. So, select the button (1), then click the button to set the object relative to another one (2) (or an advanced relation). Save the relations, the first button is now set. 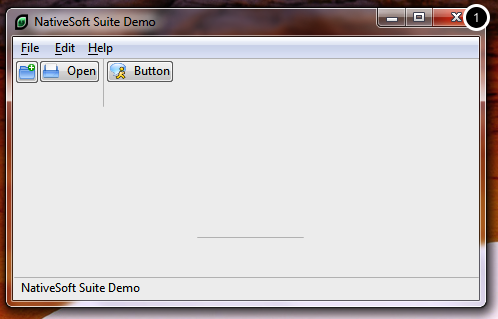
Exercice: Set the left of button "Open" to the right of the first button. You should have something that looks like the above screenshot. (1) 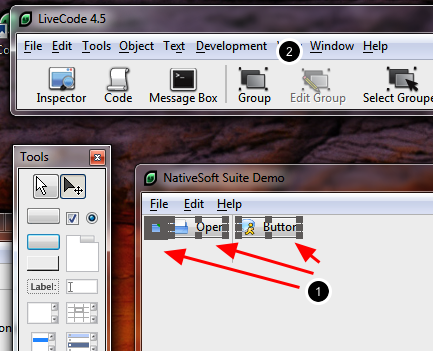
Now, select the three toolbar buttons (1), then group them by clicking (2). Set the margins of the newly created group to "0" (1). Now set the geometry of the second horizontal graphic (1), set the top of the graphic to the bottom of group created previously. (2) Edit the geometry properties of the vertical graphic (1), and resize its bottom to the bottom of the second horizontal graphic. (2) We now have a toolbar designed and you will note that so far we did not have to write any scripts! With just a few clicks we have made a cross-platform interface. Now, we must write one script, this script is to have a nice toolbar :) Fifth - The toolbar buttons hovering action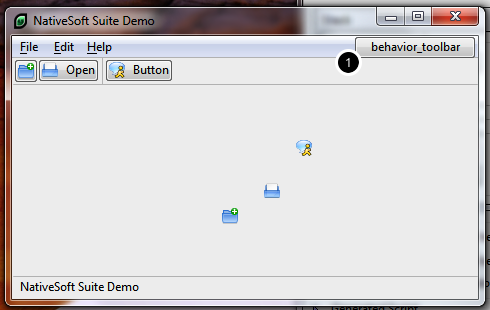
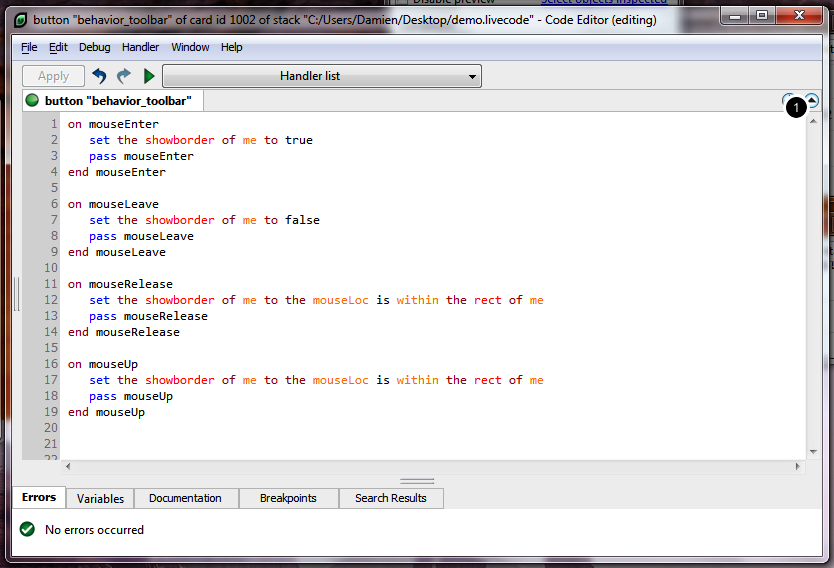
RunRev introduced in version 3.5 the "behavior" property. This property enables you to introduce some object oriented programming into LiveCode. What we want to do is have our buttons in the toolbar show their border when hovered over with the mouse. Instead of copy/pasting the same scripts into all our buttons, we will set an object that contains the script, and our toolbar buttons will "inherit" the script of this object. So, create a button, and name it "behavior_toolbar". Edit its scripts, and set it to the following (1): on mouseEnter on mouseLeave on mouseRelease on mouseUp Now, we will set the bahavior property of our buttons to the newly created button. To do that, I use the following method: set the behavior of the selectedobject to the long id of btn "behavior_toolbar" - Select the first button, and launch the command in the message box. Now we have a good looking toolbar, the end is near! 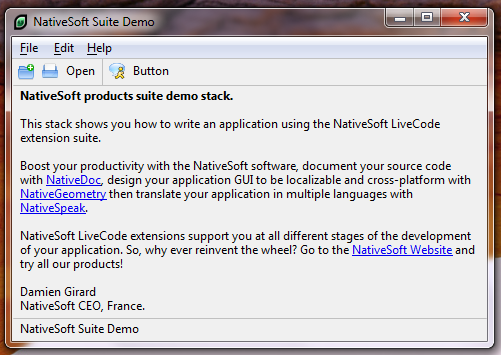
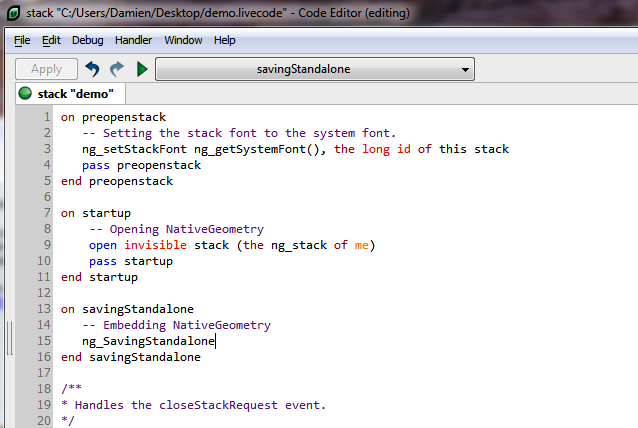
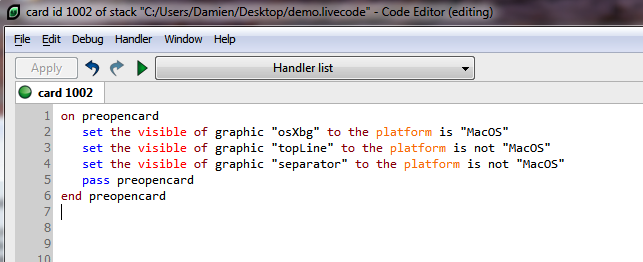
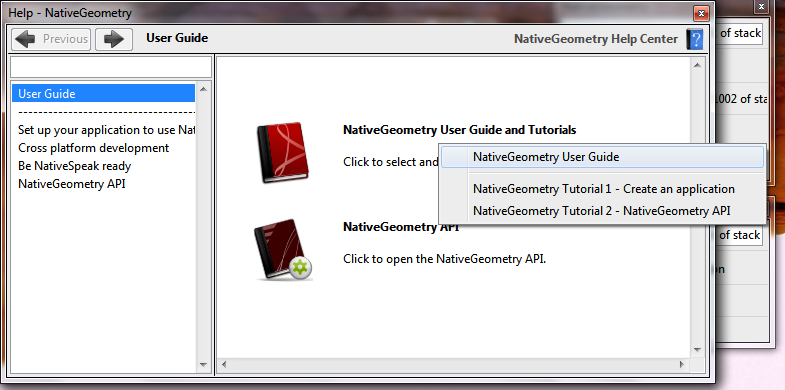
Exercise: Seventh - Integrating NativeGeometry inside the applicationFor more explanation about the following script, take a look at the first NativeGeometry tutorial, available in the NativeGeometry Help Center. Set the script of the stack to the following code: on preopenstack on startup on savingStandalone /** Eight - The Final TouchesOn MacOS X, you have to re-activate in the menu builder the property that set "menubar" as "defaultmenubar". Also, on MacOS X you have to hide few graphics, and display a white background to make it look better. The stack http://www.nativesoft.fr/downloads/NativeGeometry/NS_Demo.livecode contains this script. The End!This is the end of this lesson demonstrating how to write a cross-platform application using NativeGeometry. If you want to discover more in-depth NativeGeometry, I recommend you to check out the two NativeGeometry tutorials located inside the NativeGeometry Help Center. Also, do not forget that NativeGeometry is a library before anything and it has an extensive API! The second tutorial explains how to use it. And finally a little FAQ: - There is no need to define object resizing order? - Can I use NativeGeometry with my existing application?
Kind Regards, Damien Girard
| 

|